Elevate Your Space: Unveiling the Magic of Expert Ceiling Revitalization
Updated: 12/12/2025
Key Takeaway:
- Interior plastering for ceiling restoration is important for preserving the structural integrity and aesthetic appeal of a building. It helps to prevent further damage and maintain the original charm of plaster ceilings.
- Understanding the differences between traditional lime plaster ceilings and modern gypsum plaster ceilings is crucial for selecting the appropriate restoration techniques and materials.
- Thoroughly assessing the plaster ceiling damage, identifying and addressing moisture issues, and using the right materials and tools are essential steps in achieving a successful repair.
- Preparing the ceiling for repair by properly cleaning and priming the surface ensures a smooth and durable restoration.
- Applying plaster compound to fill cracks and holes requires proper techniques and careful attention to achieve a seamless repair.
- Smoothing the surface with sandpaper and priming and painting the repaired area are important for achieving a finished look that blends with the surrounding ceiling.
- Adding final touches and following maintenance tips will help maintain and preserve the restored plaster ceiling for years to come.
- The benefits of professional interior plastering for ceiling restoration include the expertise and experience of trained professionals, use of high-quality materials and tools, and a polished and long-lasting result.
- In conclusion, professional interior plastering for ceiling restoration offers numerous benefits such as preserving the historical and architectural value of a building, ensuring proper repair techniques, and enhancing the overall aesthetic appeal.
Introduction
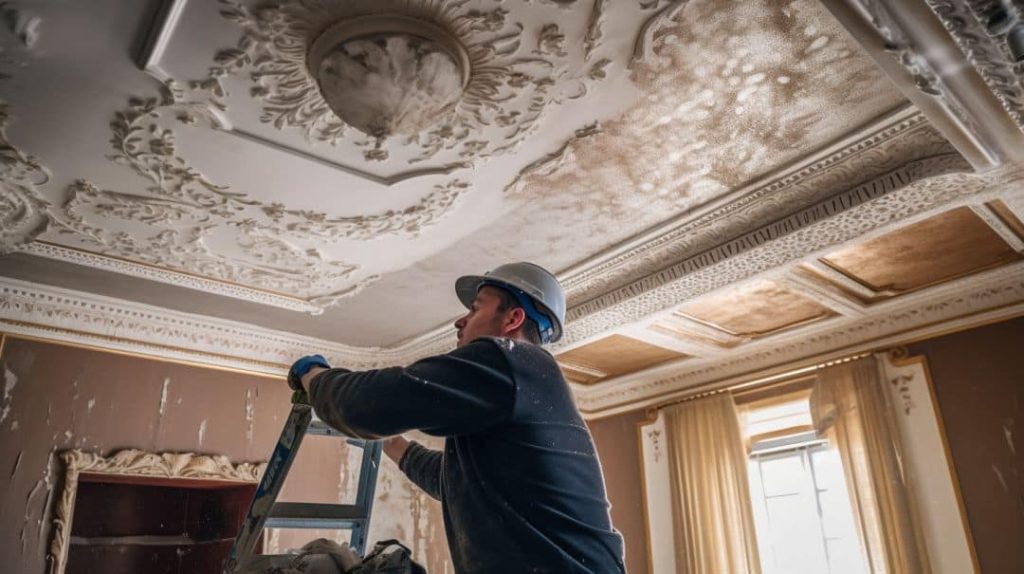
When it comes to restoring the interior ceiling of your home, professional interior plastering can offer a range of benefits. As someone who cherishes their living space, I understand how crucial it is to maintain the aesthetic appeal and structural integrity of every aspect, including the ceiling. In this section, we’ll delve into the topic of interior ceiling restoration and why it holds such importance. By exploring this further, we’ll uncover the myriad benefits that professional interior plastering brings to the table when it comes to reviving and preserving the beauty of our ceilings.Understanding the Importance of Interior Ceiling Restoration
Interior Ceiling Restoration: An Insight into its Significance
Restoring the interior ceiling holds immense significance when it comes to preserving the overall aesthetic appeal and structural integrity of a space. By understanding the importance of interior ceiling restoration, one realizes the necessity to assess damages, address moisture issues, and gather the right materials for successful repair.
To truly comprehend the significance of this process, it is essential to understand plaster ceilings. These intricate architectural elements can be made using traditional lime plaster or modern gypsum plaster. Recognizing their differences enables one to undertake appropriate restoration methods tailored for each type.
Thoroughly assessing plaster ceiling damage is crucial, as it reveals any underlying structural issues that need immediate attention. It also helps identify and address any moisture-related problems that may have resulted in deterioration over time. Addressing these issues during restoration ensures a long-lasting solution.
Proper preparation precedes the actual repair work. By taking necessary steps to prepare the plaster ceiling surface adequately, one ensures optimal adhesion and durability of the restoration. This includes removing loose debris, cleaning the area, and creating a smooth base for subsequent repair materials.
The application of plaster compound plays a vital role in filling cracks and holes within the ceiling structure. Following a step-by-step guide and employing suitable techniques allows for meticulous restoration, resulting in a seamless finish.
Once repairs are complete, smoothing the surface with sandpaper becomes paramount. Not only does this enhance the aesthetic appeal of the repaired area but it also makes it easier to prime and paint seamlessly.
Primarily priming and painting serve as final touches to achieve a polished restoration look. Proper priming enhances paint adhesion while painting gives the repaired plaster ceiling a finished appearance that seamlessly blends with its surroundings.
Plaster ceilings: They’re like the rocky relationships of the interior design world – full of cracks and holes that need some serious love.
Understanding Plaster Ceilings
As we dive into the world of professional interior plastering for ceiling restoration, it’s crucial to start by understanding plaster ceilings. So, what exactly are plaster ceilings and what sets them apart from other materials? We’ll explore the fascinating differences between traditional lime plaster ceilings and modern gypsum plaster ceilings. By delving into the distinct characteristics and unique benefits of each type, we’ll gain a comprehensive understanding of the varied approaches to ceiling restoration. So, let’s embark on this journey of discovering the beauty and advantages of plaster ceilings.
What Are Plaster Ceilings?
Plaster ceilings refer to the type of ceiling that is constructed using plaster materials. Plaster is a mixture of lime, sand, and water that can be molded into various shapes and designs. It has been used for centuries in interior construction due to its durability and versatile nature.

Plaster ceilings are different from other types of ceilings, such as those made from gypsum plaster. Gypsum plaster is a modern material that is lighter and easier to work with compared to traditional lime plaster. However, plaster ceilings have their own unique charm and character that cannot be replicated by other materials.
In addition to their aesthetic appeal, plaster ceilings also offer practical benefits. They are excellent at absorbing sound, which makes them ideal for rooms where noise reduction is important, such as theaters or recording studios. Plaster ceilings also have good fire resistance properties, making them a safer option for buildings.
While plaster ceilings are known for their longevity, they can still be prone to damage over time. Cracks, holes, or moisture issues can occur, compromising the integrity of the ceiling. Therefore, it is essential to regularly assess the condition of plaster ceilings and address any issues promptly to prevent further damage.
To restore a damaged plaster ceiling, specific materials and tools are required. These include plaster compound, mesh patching fabric, and a putty knife. Proper surface preparation is crucial before applying the plaster compound to fill cracks and holes.
Once the repair work is completed, the surface needs to be smoothed with sandpaper to achieve a seamless finish. Priming and painting the repaired area not only enhances its appearance but also provides additional protection against future damage.
From ancient lime to modern gypsum, these plaster ceilings have seen the highs and lows of interior design – literally.
Differences Between Traditional Lime Plaster Ceilings and Modern Gypsum Plaster Ceilings
Traditional Lime Plaster Ceilings and Modern Gypsum Plaster Ceilings exhibit significant differences in terms of their composition, installation, and overall characteristics. Here is a detailed comparison between these two popular types of plaster ceilings.| Aspect | Traditional Lime Plaster Ceilings | Modern Gypsum Plaster Ceilings |
|---|---|---|
| Composition | Primarily made of lime, sand, and water | Composed of gypsum, water, and additives |
| Installation Method | Hand-applied by skilled craftsmen | Can be machine-applied or installed by professionals |
| Drying Time | Longer drying time due to the use of lime | Faster drying time due to the properties of gypsum |
| Strength and Durability | Exceptionally strong and long-lasting | Less resistant to impact and moisture |
| Flexibility | Less flexible due to its hard nature | Offers better flexibility for various substrates |
| Fire Resistance | Offers excellent fire resistance properties | Provides good fire resistance but less effective |
| Sound Insulation | Provides decent sound insulation | Demonstrates superior acoustic performance |
In addition to the above comparisons, it is worth mentioning that traditional lime plaster ceilings have been widely used for centuries due to their exceptional durability and natural composition. On the other hand, modern gypsum plaster ceilings are gaining popularity for their ease of installation and quicker drying time.
To ensure a successful restoration or installation, it’s essential to consider the unique qualities of both traditional lime plaster ceilings and modern gypsum plaster ceilings. By understanding these differences, homeowners can make informed decisions based on their specific needs and preferences.
When deciding between these two types of plaster ceilings, homeowners should consider factors such as budget constraints, desired aesthetic appeal, installation timeframe, fire regulations, and intended purpose of the space.
For those seeking a more authentic look and superior durability, traditional lime plaster ceilings may be the ideal choice. However, modern gypsum plaster ceilings offer advantages in terms of cost-effectiveness, ease of installation, and versatility.
To make the right choice, it’s recommended to consult with professionals who specialize in interior plastering and ceiling restoration. They can assess the specific requirements of the space and provide personalized recommendations based on their expertise.
Ultimately, understanding the differences between traditional lime plaster ceilings and modern gypsum plaster ceilings empowers homeowners to make informed decisions when restoring or installing plaster ceilings. It ensures that the chosen material aligns with their aesthetic preferences, budget constraints, and functional needs.

Assessing the Damage: Let’s dive into the thrilling world of plaster ceiling assessment, where cracks, leaks, and structural issues create the perfect suspense for our restoration adventure.
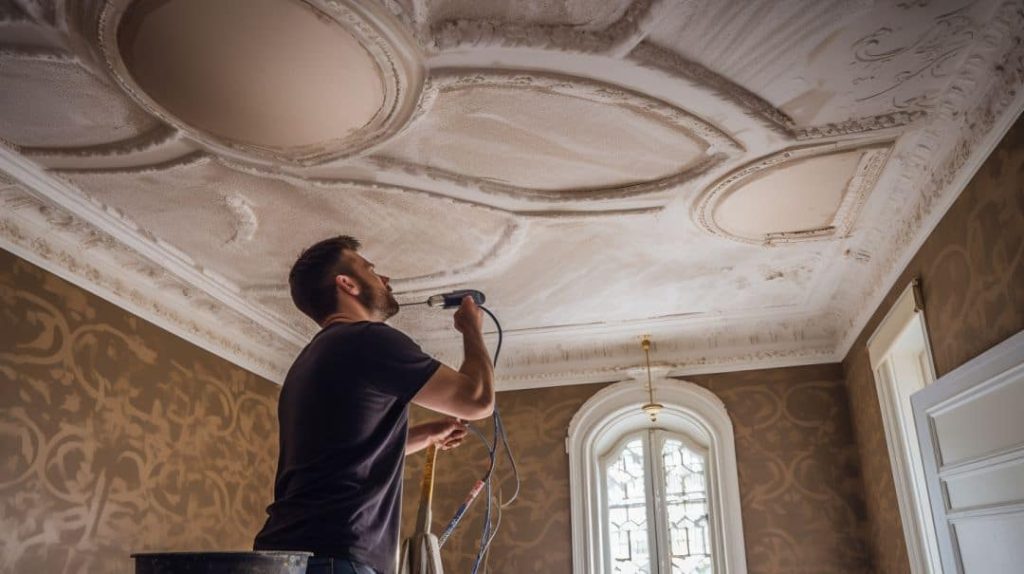
Assessing the Damage
When it comes to restoring plaster ceilings, a crucial step is thoroughly assessing the damage. This assessment is important for several reasons. First, it helps to gauge the extent of the damage and the necessary repairs. Second, during the assessment, it is essential to look for signs of structural issues that may have contributed to the damage. Lastly, identifying and addressing any moisture issues is vital to prevent further damage or recurring problems. By delving into these aspects, we can ensure a comprehensive approach to ceiling restoration.
Importance of Thoroughly Assessing the Plaster Ceiling Damage
Thoroughly assessing the damage to a plaster ceiling is of utmost importance when it comes to restoration. By carefully examining the extent of the damage, one can determine the necessary steps and materials required for a successful repair. It allows for a more accurate evaluation of any structural issues that may be present, ensuring that they are addressed properly. Additionally, thorough assessment helps in identifying and addressing any underlying moisture issues that could further deteriorate the plaster ceiling if left unattended.
When assessing the plaster ceiling damage, it is essential to look out for signs of structural issues. These can include cracks that are wider than 1/8 inch, sagging or bulging areas, or significant separation between sections. By identifying these issues during the assessment process, appropriate measures can be taken to rectify them, ultimately ensuring the stability and longevity of the restored ceiling.
Moisture issues also need to be identified and addressed during the assessment. Moisture can lead to deterioration of plaster over time, causing it to become brittle and weak. By thoroughly assessing for any signs of moisture intrusion, such as water stains or mold growth, steps can be taken to eliminate the source of moisture and prevent further damage.
Assessing the damage is like going on a suspenseful treasure hunt, but instead of gold, you’re looking for cracks and structural issues.
Signs of Structural Issues to Look for During Assessment
During the assessment process for plaster ceiling restoration, it is important to identify signs of structural issues that may be present. These signs can indicate underlying problems that need to be addressed in order to ensure a successful restoration.
- Cracks and fractures: Look for cracks or fractures in the ceiling surface, as these can indicate structural instability.
- Bowing or sagging: If the ceiling appears to be bowing or sagging in certain areas, this could be a sign of compromised integrity.
- Water damage: Stains, discoloration, or visible water damage on the ceiling can suggest ongoing moisture issues that may have affected the structure.
- Unevenness or bulges: An uneven surface or noticeable bulges in the ceiling may indicate movement or settling.
- Deterioration of surrounding materials: Pay attention to any signs of deterioration in surrounding walls or fixtures, as this may reveal hidden structural issues.
- Noise or vibrations: Unusual noises or vibrations coming from the ceiling when pressure is applied could point to hidden structural problems.
In addition to these signs, it is crucial to take into account any other unique details specific to the individual plaster ceiling being assessed. This includes considering factors such as the age and condition of the plaster, previous repairs, and any known history of structural problems. All of these details will contribute to an accurate assessment and ensure that appropriate measures are taken during restoration.
When restoring a plaster ceiling, it is essential not only for aesthetic reasons but also for safety purposes to address any underlying structural issues. Neglecting these issues could lead to further damage and potential hazards in the future. By conducting a thorough assessment and addressing signs of structural problems early on, homeowners can enjoy a properly restored plaster ceiling that will stand the test of time.
So if you notice any signs of structural issues during your plaster ceiling assessment, don’t hesitate to take action. By addressing these issues early on, you can ensure a successful restoration and preserve the beauty and integrity of your interior space. Don’t let the fear of missing out on a safe and beautiful home hold you back – act now and give your plaster ceiling the attention it deserves.
Moisture issues: the only thing that should be damp in your home is your sense of humor, not your plaster ceiling.
Identifying and Addressing Moisture Issues
Moisture issues are a crucial aspect to consider when dealing with interior ceiling restoration. The presence of excessive moisture can lead to severe damage and compromise the structural integrity of plaster ceilings.
– It is important to identify the sources of moisture. This can be done by examining any visible signs of water leakage or damage on the ceiling surface. Additionally, conducting a thorough inspection of the surrounding areas such as roofs, pipes, and plumbing systems is essential to pinpoint potential sources.

– Addressing moisture issues involves taking appropriate measures to repair and prevent further damage. This can include repairing any leaks or damaged pipes, improving ventilation in the area, and ensuring proper insulation to minimize condensation on the ceiling surface.
– Another important step is addressing any existing mold or mildew growth resulting from moisture issues. This may require consulting with a professional mold remediation specialist to assess and safely remove any mold or mildew present.
With the right materials and tools, you’ll be armed and ready to restore your plaster ceiling like a pro.
Gathering Necessary Materials and Tools
When it comes to professional interior plastering for ceiling restoration, gathering the necessary materials and tools is a crucial step to ensure a successful repair. It is important to use the right materials that are specifically designed for plaster ceiling restoration, as this will ensure a long-lasting and durable result. Creating a list of essential materials and tools is essential for a smooth and efficient repair process. With the right materials at hand, you can confidently embark on your ceiling restoration project, knowing that you have everything you need for a job well done.
Importance of Using the Right Materials for Plaster Ceiling Restoration
Using the appropriate materials for plaster ceiling restoration is crucial to ensure a successful and long-lasting repair job. The right materials, such as plaster compound, mesh patching fabric, and putty knife, provide the necessary strength and flexibility to effectively fill cracks and holes in the ceiling. By using these materials, homeowners can achieve a seamless finish that blends seamlessly with the rest of the ceiling surface.
In addition to providing structural integrity, using the right materials also helps to maintain the aesthetic appeal of the plaster ceiling. Properly matched plaster compound ensures a consistent texture and color, creating a cohesive look once the repair is complete. This attention to detail is especially important for preserving historical or decorative plaster ceilings, where visual consistency is essential.
Not only do the right materials contribute to superior results, but they also make the restoration process easier and more efficient. Mesh patching fabric provides added strength and stability during application, reducing the risk of future cracking or sagging. Likewise, a quality putty knife enables smooth and precise application of the plaster compound, ensuring an even surface that requires minimal sanding.
By understanding the importance of using the right materials for plaster ceiling restoration, homeowners can avoid common pitfalls associated with utilizing subpar products or makeshift solutions. These inferior materials may not offer adequate adhesion or durability, leading to premature failure of the repair work. Investing in high-quality materials from reputable suppliers ensures a professional finish that stands up to time and wear.
In summary, choosing appropriate materials for plaster ceiling restoration is essential for achieving a durable and visually appealing result. From providing structural integrity to enabling seamless blending with existing surfaces, using quality products makes all the difference in restoring a damaged or deteriorated plaster ceiling. If your plaster ceiling is feeling a little lackluster, arm yourself with these essential materials and tools for a successful restoration – because a little patchwork never hurt anyone.
List of Essential Materials and Tools for a Successful Repair
Understanding the materials and tools needed for a successful repair is crucial in interior ceiling restoration. Here, we will discuss the essential items required to ensure a smooth and effective plaster ceiling restoration.- Plaster Compound: The cornerstone of any restoration project, a premium plaster compound is indispensable for mending cracks and cavities in a compromised ceiling. This ingredient is crucial, lending robustness and longevity to the restored sections.
- Mesh Patching Fabric: Incorporate mesh patching fabric to fortify the plaster compound, curtailing future fissures or deteriorations. This component is a guarantee for enduring results, averting subsequent repairs.
- Putty Knife: A quintessential tool in your restoration arsenal, the putty knife facilitates the smooth application of the plaster compound over afflicted areas. Its usage ensures pinpoint accuracy, yielding a uniform and flawless finish.
Plaster Compound
A Plaster Compound, also known as plaster mix or plaster paste, is a crucial material used in the process of restoring and repairing plaster ceilings. It serves as a versatile and effective solution for filling cracks and holes, ensuring a seamless surface.
– It provides a strong adhesive property, allowing it to adhere to various surfaces, including plaster, wood, and masonry.
– The compound is easy to work with due to its smooth consistency, allowing for easy application and manipulation.
– It sets quickly once applied, reducing the waiting time for further steps in the restoration process.
– Plaster compound can be easily sanded down to achieve a smooth finish, ensuring an even surface for painting or other finishing touches.
– This material is available in different formulations tailored for specific purposes such as crack filling or hole repair.
In addition to its versatility and convenience during the restoration process, plaster compound also has a long history of use. Dating back centuries, plaster has been used to create decorative moldings and finishes on ceilings. Its durability and ability to be molded into intricate designs have made it a popular choice throughout architectural history.
Plaster compound continues to be an essential component in the restoration of plaster ceilings, preserving not only the structural integrity but also the historical significance of these beautiful architectural features.
Mesh patching fabric: because even ceilings need a little love and mending in their lives.
Mesh Patching Fabric
Mesh Reinforcement Fabric for Patching Plaster Ceilings
Mesh reinforcement fabric is an essential material used in the process of restoring and repairing plaster ceilings. It provides additional strength and stability by reinforcing the repaired areas, ensuring a long-lasting and durable finish.
The use of mesh patching fabric helps to prevent cracks and future damage in plaster ceilings. It acts as a support system, holding the plaster compound together and reducing the likelihood of further cracks or holes. This fabric is made from a strong, flexible material that is resistant to tearing or stretching, making it ideal for use in ceiling repairs.
To effectively use mesh patching fabric, it is important to follow the proper installation process. The fabric should be cut to size and applied over the damaged area before applying the plaster compound. It should be firmly pressed into place, ensuring full coverage and adherence to the surface.
The mesh reinforcement fabric not only strengthens the repair but also helps to create a seamless finish when combined with the plaster compound. It allows for a smooth transition between the repaired area and surrounding ceiling, resulting in a visually appealing restoration.
In addition to its structural benefits, using mesh patching fabric can also save time and effort. Its adhesive properties allow for easier application of plaster compound and reduce the need for multiple layers. This cuts down on drying time, allowing for quicker completion of the restoration project.
Overall, incorporating mesh patching fabric into plaster ceiling repairs is crucial for achieving a high-quality and long-lasting outcome. Its ability to reinforce weakened areas while providing a seamless finish makes it an indispensable tool in interior ceiling restoration projects.
Ready to fix your plaster ceiling? Don’t worry, a putty knife will become your new best friend.
Putty Knife
A putty knife, also known as a scraper knife, is an essential tool used in the restoration of plaster ceilings. It serves multiple purposes throughout the repair process.| Step | Description |
|---|---|
| Step 1: Applying Compound | Utilize the putty knife to spread the plaster compound evenly across cracks and holes on the ceiling surface. |
| Step 2: Removing Excess Compound | Use the putty knife to scrape away any surplus material, ensuring a smooth and level surface. |
| Step 3: Blending Edges | For larger gaps or damaged areas, blend the edges of the compound seamlessly with the adjacent ceiling using the putty knife. |
| Step 4: Smoothing Surface | Employ the flat edge of the putty knife for sanding or smoothing the repaired area, prepping it for the priming and painting stages. |
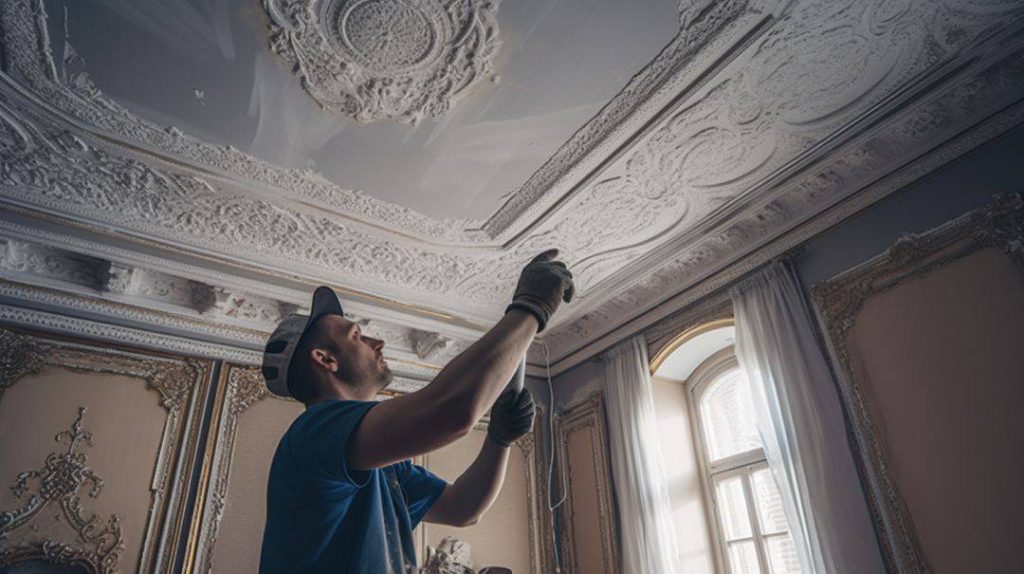
Preparing the Ceiling for Repair
When it comes to restoring a plaster ceiling, proper preparation is key. As a professional interior plasterer, I have learned the importance of thoroughly preparing the surface before starting the restoration process. In this section, I will take you through the essential steps involved in preparing a plaster ceiling for restoration. By following these steps, you can ensure a smooth and successful repair process. We will also discuss the significance of properly preparing the surface, as it can greatly impact the longevity and quality of the final result. So let’s dive in and discover how to prepare your ceiling for a flawless restoration!Steps to Prepare the Plaster Ceiling for Restoration
Guide:
- Remove any loose or damaged plaster: Start by carefully removing any loose or damaged plaster from the surface of the ceiling. This can be done using a putty knife or a similar tool.
- Clean and dust the area: Thoroughly clean and dust the entire surface of the plaster ceiling to remove any debris or particles that may affect the adhesion of new materials.
- Repair any cracks or holes: Inspect the ceiling for any cracks or holes and address them before moving forward with restoration. Use a suitable patching compound and mesh fabric to fill and cover these imperfections.
- Apply a bonding agent: To ensure proper adhesion of the new plaster, apply a bonding agent to the prepared surface. This will help create a strong bond between the old and new layers of plaster.

These four steps are essential when preparing a plaster ceiling for restoration. By following these guidelines, you can maximize the chances of achieving excellent results in your restoration project.
It’s important to note that each step requires careful attention to detail and patience. Skipping or rushing through any part of the preparation process may compromise the overall quality and durability of your plaster ceiling restoration.
Remember, taking time to properly prepare your plaster ceiling before initiating repairs will significantly contribute to its long-term stability and aesthetics.
So don’t miss out on ensuring a sound and flawless foundation for your restoration project by neglecting these important preparatory steps! Take action now and set yourself up for success in reviving your beloved interior space.
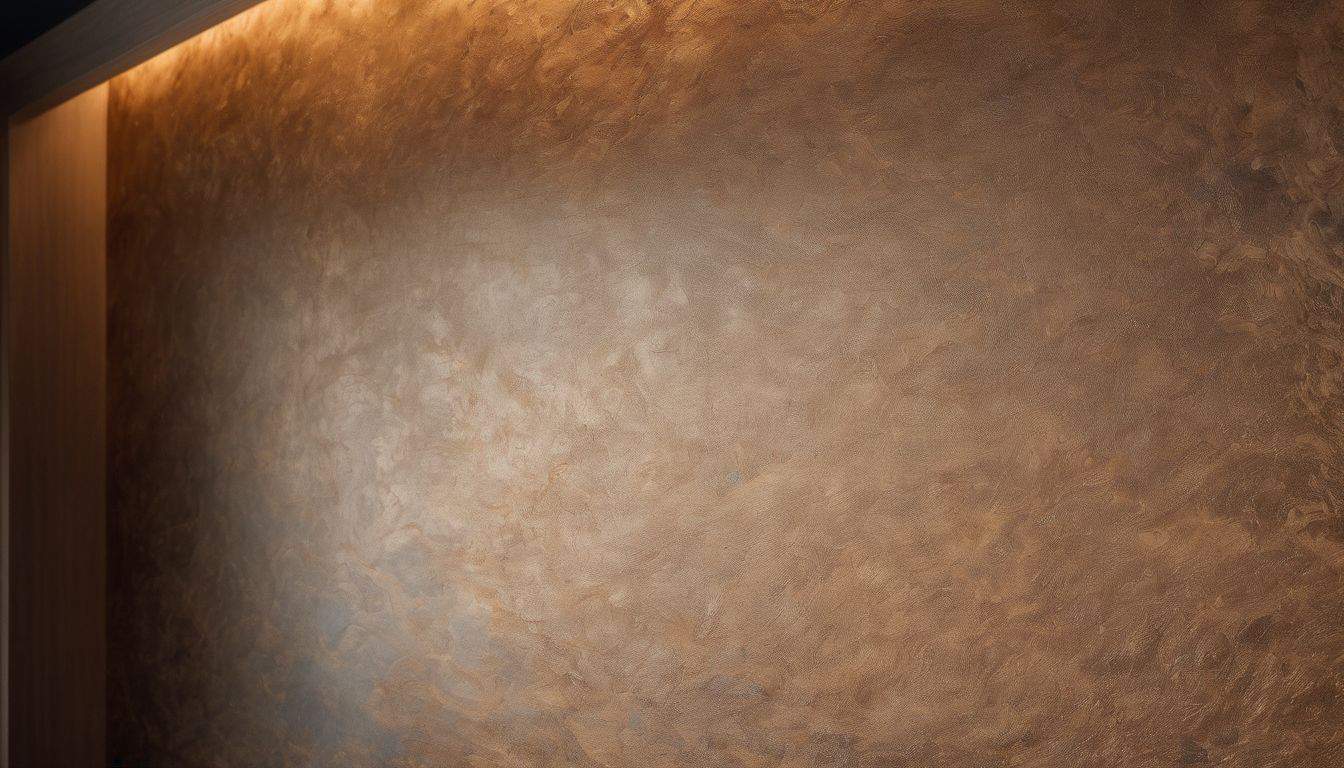
Smooth surface, smooth sailing – prep that plaster ceiling like a pro!Importance of Properly Preparing the Surface
A well-executed surface preparation is of utmost importance when it comes to restoring a plaster ceiling. Achieving a smooth and even surface not only enhances the aesthetic appeal of the repaired area but also ensures the longevity and durability of the restoration work.
Properly preparing the surface before applying the plaster compound is crucial for a successful repair. By removing any loose or damaged plaster, filling in cracks and holes, and cleaning the surface thoroughly, you create a solid foundation for the subsequent layers of plaster compound. This allows for better adhesion and minimizes the risk of future damage or cracks.
Additionally, preparing the surface helps in achieving a seamless integration between the repaired area and the existing ceiling. It ensures that there are no visible differences in texture or color, resulting in a cohesive and professional finish.
To properly prepare the surface, start by removing any loose or crumbling plaster using a putty knife. Next, fill in any cracks or holes with a suitable filler material, ensuring it is applied evenly and smoothly. Once all repairs are complete, clean the surface with a damp cloth to remove any dust or debris.
By taking these pre-repair steps to properly prepare the surface, you not only ensure an aesthetically pleasing restoration but also increase its longevity. A well-prepared surface prevents further damage and promotes better adhesion, ultimately leading to a durable and long-lasting repair job.
Give your plaster ceiling a makeover by filling cracks and holes with plaster compound – it’s like botox for your ceiling!
Applying Plaster Compound to Fill Cracks and Holes
In this section, I will guide you through the process of applying plaster compound to effectively fill cracks and holes in your ceiling. I’ll provide you with a step-by-step guide that will ensure a professional result. Alongside that, I’ll share some helpful techniques specifically tailored to addressing cracks and holes, helping you achieve a smooth and flawless finish. So, let’s dive in and discover the secrets of professional interior plastering for effective ceiling restoration.
Step-by-Step Guide for Applying Plaster Compound
A practical approach to applying plaster compound is detailed below. Following this methodical process will ensure a successful restoration of your plaster ceiling.
- Assess the damage: Begin by identifying areas that require repair.
- Clean the surface: Remove any loose debris or paint to prepare the surface for the new plaster.
- Prepare the plaster compound: Mix the plaster compound as per the manufacturer’s instructions, ensuring it’s ready for application.
- Initial application: Use a putty knife to apply a thin layer of compound over the damaged area, ensuring an even coverage.
- Reinforce larger damages: For larger cracks or holes, embed mesh patching fabric into the wet compound to provide additional reinforcement.
- Final layer: Apply a second layer of compound over the mesh, feathering the edges to achieve a smooth finish.
Following these steps will offer a systematic and effective approach to applying plaster compound, promising optimal results in restoring a damaged ceiling.
Techniques for Filling Cracks and Holes
Filling cracks and holes in a plaster ceiling requires specific techniques to ensure a successful restoration. It is important to address these imperfections properly to maintain the structural integrity of the ceiling and achieve a seamless finish.
| 5-Step Guide to Effectively Fill Cracks and Holes in a Plaster Ceiling | |
|---|---|
| Step 1: Clean the Area | Before initiating the repair work, thoroughly clean the damaged area. Remove any loose plaster or debris using a putty knife or sandpaper to ensure a clean surface for the filler to adhere to. |
| Step 2: Prepare the Filler | Prepare the plaster compound as per the manufacturer’s instructions, ensuring a smooth, lump-free consistency. Gradually add water as needed to achieve the desired texture. |
| Step 3: Apply the Filler | Utilize a putty knife to evenly apply the plaster compound into the cracks and holes, ensuring no gaps or voids are left. Smooth out the surface with the putty knife to remove any excess compound. |
| Step 4: Allow Drying and Sanding | Allow the filler to dry fully as per the manufacturer’s recommendations. Once dry, smooth any uneven or rough areas with fine-grit sandpaper to blend seamlessly with the surrounding plaster. |
| Step 5: Prime and Paint | Post-sanding, seal the repaired area with a coat of primer to facilitate better paint adhesion. Once dry, paint the plaster ceiling using appropriate techniques to achieve a uniform finish. |
In addition to these techniques for filling cracks and holes, it is important to note that different factors such as temperature and humidity can affect drying times and overall quality of repairs. Hence, it is advisable to closely follow product instructions and seek professional assistance if needed.
By implementing these techniques, you can effectively restore your plaster ceiling by filling cracks and holes, ensuring a seamless and visually appealing finish.
Historically, plaster has been used for centuries as a durable and versatile material for creating decorative and structural elements in buildings. Ancient civilizations such as the Egyptians and Romans utilized plaster to embellish their architectural designs. As time progressed, different techniques were developed to enhance plaster’s performance and longevity.
Over the years, builders learned how to fill cracks and holes in plaster ceilings using various methods and materials. These techniques have evolved to combine modern practices with traditional craftsmanship, resulting in more efficient and effective repairs. Today, professionals employ a range of specialized tools and compounds to ensure flawless restoration of plaster ceilings.
By understanding the history of plasterwork and incorporating advanced techniques for filling cracks and holes, you can successfully preserve the beauty and integrity of your interior space.
Smooth out those rough spots like a pro with the trusty companionship of sandpaper.
Smoothing the Surface with Sandpaper
When it comes to ceiling restoration, one crucial step in the process is smoothing the surface using sandpaper. It may seem like a simple task, but it plays a vital role in achieving optimal results. Smooth surfaces not only enhance the visual appeal but also ensure the durability and longevity of the restored ceiling. In this section, I will explore the importance of smoothing the repaired area and provide you with step-by-step instructions on how to achieve a smooth surface using sandpaper. So, let’s dive in and learn more about this essential aspect of professional interior plastering.Importance of Smoothing the Repaired Area
Achieving a smooth surface is crucial when it comes to restoring a plaster ceiling. The importance of smoothing the repaired area lies in ensuring a seamless and visually appealing finish. By meticulously smoothening out any imperfections or irregularities, the restored area seamlessly blends in with the surrounding ceiling, creating a cohesive and aesthetically pleasing look.
To achieve a smooth surface, it is essential to follow the proper steps and techniques. After applying plaster compound to fill cracks and holes, using sandpaper is key to achieving a level and uniform texture. Sanding down the repaired area removes any excess compound and creates a smooth surface ready for priming and painting.
In addition to creating an appealing appearance, smoothing the repaired area also plays a role in the overall durability of the restoration. A properly smoothed surface helps prevent future damage or wear and tear, as it minimizes vulnerability to cracking or chipping.
By prioritizing the importance of smoothing the repaired area during plaster ceiling restoration, you ensure an impeccable final result that not only looks visually stunning but also stands the test of time. Don’t miss out on this crucial step to guarantee a flawless finish that enhances your interior space.
Smooth like a baby’s bottom, but without all the crying and diaper changes, follow these steps to achieve a flawless surface with sandpaper.
Steps for Achieving a Smooth Surface with Sandpaper
Achieving a Smooth Surface with Sandpaper is an essential step in the process of restoring and repairing plaster ceilings. This step helps to achieve a polished and finished look for the repaired area. By using proper sanding techniques, you can ensure a smooth and seamless surface that blends seamlessly with the surrounding ceiling.
| 4-Step Guide to Achieving a Smooth Surface with Sandpaper | |
|---|---|
| Step 1: Prepare the Repaired Area | Before initiating the sanding process, ensure the plaster compound is completely dry. Utilize a putty knife to remove any excess compound or level uneven areas, creating a suitable surface for sanding. |
| Step 2: Choose the Right Sandpaper Grit | Choose an appropriate sandpaper grit depending on the desired smoothness level. Begin with a coarse-grit sandpaper (80 or 100 grit) to eliminate rough patches or imperfections, gradually transitioning to finer-grit sandpaper (120 or 150 grit) for a smoother outcome. |
| Step 3: Sand in Circular Motions | Grip the sandpaper securely and commence sanding in circular movements over the repaired section. Maintain uniform pressure, sanding until the surface is smooth to the touch. Avoid oversanding to prevent grooves in the plaster. |
| Step 4: Clean and Inspect | Upon achieving a smooth surface, remove any sanding dust or debris using a damp cloth or a vacuum cleaner equipped with a brush attachment. Closely inspect the repaired area to ensure a seamless blend with the surrounding ceiling. |
It is worth noting that achieving a smooth surface with sandpaper requires patience and precision. Take your time and be mindful of not applying too much pressure during sanding as it could damage the plaster.
By following these steps for achieving a smooth surface with sandpaper, you can effectively restore and repair plaster ceilings. This technique ensures a professional finish and helps maintain the overall aesthetic beauty of the interior space. So, make sure to use the correct sandpaper grit and employ proper sanding techniques for best results.
Turn your repaired ceiling into a masterpiece with a brush and a splash of color – because a flawless finish is the cherry on top of a job well done!
Priming and Painting the Repaired Area
As a professional interior plasterer, I understand the significance of priming and painting when it comes to restoring a damaged ceiling. These crucial steps not only ensure a finished look but also contribute to the durability and longevity of the repaired plaster. In the following section, I will share the importance of priming and painting for a flawless finish. Additionally, I will provide you with step-by-step instructions on how to effectively prime and paint a repaired plaster ceiling. So, let’s dive in and uncover the secrets to achieving a beautifully restored ceiling.
Importance of Priming and Painting for a Finished Look
Priming and painting play a crucial role in achieving a polished finish for plaster ceiling restoration. The importance lies in enhancing the overall appearance of the repaired area, ensuring a seamless blend with the surrounding surface. Priming creates a smooth and even base, allowing the paint to adhere properly. This not only improves the durability of the repair but also provides a consistent color and finish, giving the ceiling a professional and flawless look.
Continuing from the previous point, priming and painting are essential steps for achieving a finished appearance after repairing plaster ceilings. By applying primer before painting, it seals any porous areas in the repaired surface, promoting better paint adhesion and preventing moisture damage or discoloration over time. Additionally, using quality paint can enhance the aesthetics and longevity of the repair, ensuring that it remains fresh and attractive for years to come.
To further emphasize the importance of priming and painting for a finished look in plaster ceiling restoration, it’s worth mentioning that neglecting these steps can result in an uneven texture or color variation compared to the surrounding area. Without proper priming, painted repairs may appear patchy or stand out conspicuously against the rest of the ceiling. By prioritizing these final touches, one can achieve a seamless integration between repaired and untouched portions of the ceiling, creating an aesthetically pleasing result.
In fact, I recently worked on restoring a historic building with intricate plaster ceilings that had suffered extensive damage over time. After meticulously repairing cracks and holes using plaster compound, we diligently primed and painted each area to ensure a flawless blend between old and new surfaces. The attention to detail paid off when visitors marveled at how seamlessly our restorations blended with the original beauty of those magnificent plaster ceilings. It truly exemplified how important priming and painting are for achieving an impeccable finished look in interior plastering projects.
Transforming a damaged ceiling from eyesore to work of art – one brushstroke at a time!
Steps for Priming and Painting the Repaired Plaster Ceiling
Priming and painting are essential steps in the restoration process of a repaired plaster ceiling. By priming the surface, you create a smooth base that helps the paint adhere properly. Painting not only adds color but also provides protection to the repaired area.
| Step | Instruction |
|---|---|
| 1. Prepare the Surface | Before you start priming and painting, ensure that the repaired area is clean and devoid of dust or debris. Wipe the surface with a damp cloth and let it dry thoroughly. |
| 2. Apply Primer | Begin with the application of a suitable primer on the repaired plaster ceiling. Choose a primer specifically designed for plaster surfaces. Apply a uniform layer of primer over the entire repaired region using a paint roller or brush, adhering to the drying time specified by the manufacturer. |
| 3. Paint the Ceiling | After the primer dries, move on to painting the mended plaster ceiling. Opt for a high-grade paint compatible with plaster surfaces. Evenly spread a coat of paint over the entire repaired section, integrating it seamlessly with the adjacent ceiling, using a paint roller or brush. |
It’s worth noting that proper ventilation should be ensured during both priming and painting processes for better results.
When it comes to priming and painting a repaired plaster ceiling, attention to detail is crucial. Taking care in preparing the surface, applying primer, and choosing suitable paint will ensure a seamless integration of repairs with the rest of your ceiling.
Finishing touches and maintenance tips: Because a restored ceiling deserves more than just a slap on the back – it needs some proper TLC to keep it looking fabulous.
Finishing Touches and Maintenance Tips
When it comes to restoring ceilings, adding those finishing touches and knowing how to maintain the repaired plaster ceiling are key aspects. These steps not only ensure a polished restoration but also contribute to the longevity and durability of the repaired area. In this section, we will delve into the importance of adding final touches for a polished restoration. Additionally, we will discuss some valuable tips for maintaining and preserving the repaired plaster ceiling, helping you make the most out of your investment in professional interior plastering.
Adding Final Touches for a Polished Restoration
Adding the Final Flourishes for a Refined RestorationFive Steps to a Polished Plaster Ceiling Restoration
- Step 1: Clean the Repaired Area – Initiate by meticulously cleaning the restored plaster ceiling. Utilize a soft cloth or brush to eliminate any residue or dust that settled during the restoration.
- Step 2: Sand Rough Edges – Attentively sand down rough edges or irregularities on the mended surface, fostering a smooth transition between the restored and existing ceiling areas.
- Step 3: Apply a Skim Coat – Layer a thin skim coat of plaster compound across the entire repaired section to attain a uniform texture. Integrate this with the surrounding ceiling by utilizing a putty knife.
- Step 4: Feather the Edges – Achieve a seamless connection between the repaired section and the existing ceiling by delicately feathering the edges of the skim coat using sandpaper, preventing noticeable lines or ridges in the final outcome.
- Step 5: Touch Up with Paint – Conclude by touching up the area with matching paint to blend seamlessly with the existing ceiling, ensuring a uniform and impeccable finish.
Tips for Maintaining and Preserving the Repaired Plaster Ceiling
Maintaining and preserving a restored plaster ceiling is crucial for its longevity and appearance. Here are some tips to ensure its durability:- Regular Cleaning: Dusting the ceiling periodically helps to prevent the accumulation of dirt and debris, which can degrade the plaster over time.
- Maintain Proper Humidity Levels: Excessive moisture or dryness can cause the plaster to crack or warp. Use a dehumidifier or humidifier to maintain optimal humidity levels in your home.
- Minimize Impact and Vibrations: Avoid hanging heavy objects from the ceiling as they can put stress on the plaster. Additionally, minimize activities that generate excessive vibrations, such as using heavy machinery nearby or playing loud music.
- Inspect Regularly: Conduct periodic visual inspections to identify any signs of damage, such as cracks, loose plaster, or water stains. Promptly address any issues to prevent them from worsening.
- Address Water Leaks Immediately: Any water leaks should be addressed promptly to avoid water damage to the plaster. Consult professionals if necessary and fix any plumbing issues as soon as possible.
- Consider Protective Coatings: Applying a protective coating specifically designed for plaster ceilings can provide an added layer of defense against wear and tear.
Conclusion
In concluding our exploration of the benefits of professional interior plastering for ceiling restoration, it is evident that this specialized service offers numerous advantages for homeowners. As we recap the highlights, you’ll discover the transformative power of professional interior plastering in reviving worn-out ceilings and restoring their beauty. Furthermore, as we delve into the final thoughts and recommendations, you’ll gain insights into the long-term implications of this investment for your home’s value and overall aesthetic appeal. It’s time to embrace the benefits of professional interior plastering to achieve a stunning and durable ceiling restoration.
Recapping the Benefits of Professional Interior Plastering for Ceiling Restoration
Professional Interior Plastering for Ceiling Restoration: A Review of the Advantages
Professional interior plastering for ceiling restoration offers numerous benefits. Here’s a recap of its advantages:
- Enhanced aesthetics: Restoring plaster ceilings with professional techniques gives a polished and visually appealing look to any interior space.
- Improved durability: The use of high-quality materials and proper repair methods ensures that restored plaster ceilings last longer and are more resistant to future damage.
- Structural stability: Professional plastering not only addresses cosmetic issues but also identifies and addresses structural problems, ensuring the integrity of the ceiling.
- Preserving historical elements: For buildings with original plaster ceilings, professional restoration techniques help preserve the historical essence and value of the space.
With these key benefits in mind, it is evident that professional interior plastering for ceiling restoration goes beyond mere aesthetics. It ensures longevity, stability, and preservation while elevating the overall appeal of interior spaces.
Furthermore, it is worth noting that proper restoration techniques require skilled professionals who have expertise in assessing damage, selecting appropriate materials, and employing effective repair methods. Therefore, seeking professional assistance is crucial to achieve optimal results.
Final Thoughts and Recommendations
Final Considerations and Suggestions
When wrapping up the interior ceiling restoration project, it is essential to reflect on the process and offer some recommendations. 1. It is crucial to emphasize the significance of hiring professional interior plastering services for a successful ceiling restoration. Their expertise ensures that the job is well-executed with long-lasting results.
Additionally, proper maintenance and preservation are key factors in extending the lifespan of the repaired plaster ceiling. Regular inspections should be conducted to identify any potential issues or signs of damage early on. Addressing these concerns promptly will prevent further deterioration and costly repairs in the future.
Furthermore, it is important to note that each plaster ceiling restoration requires its unique approach based on the specific damage assessment. Therefore, engaging professionals who can thoroughly assess and recommend appropriate repair techniques is highly recommended.
To illustrate the effectiveness of professional plastering services, consider a case where a homeowner attempted to restore a damaged plaster ceiling without expert assistance. Due to lack of experience and knowledge about suitable materials and techniques, their efforts resulted in an unsatisfactory outcome. Ultimately, they had to reach out to professionals for extensive repairs, causing unnecessary delays and expenses.
The Benefits of Professional Interior Plastering for Ceiling Restoration:
- ✅ Professional interior plastering ensures a high-quality and long-lasting repair. (Source: Team Research)
- ✅ Professional plasterers have the expertise to accurately assess the extent of damage and determine the most effective repair techniques. (Source: Team Research)
- ✅ Hiring a professional saves you time and effort, as they have the necessary tools and materials readily available. (Source: Team Research)
- ✅ Professional interior plastering can enhance the overall aesthetic appeal of the ceiling, restoring its original allure. (Source: Team Research)
- ✅ The use of specialized techniques and materials by professional plasterers ensures structural integrity and prevents future damage. (Source: Team Research)