The Proven Matching Process That Prevents “Flashing” Patches
A small patch on an Exterior Insulation and Finish System (EIFS) wall can stand out for years if the repair work is rushed. Even a skilled contractor can leave behind a visible outline that catches the eye every time sunlight rakes across the facade. The difference between a repair that blends and one that “flashes” often comes down to planning, material selection, and proper technique.
Property owners across Central Indiana frequently ask why EIFS repairs sometimes look perfect and other times appear mismatched. The answer involves more than just picking the right paint color. Texture profile, aggregate size, coating thickness, sun exposure history, and even the time of day the work is performed all play a role in whether a patched area disappears into the surrounding wall or becomes a permanent eyesore.
💡 Quick Facts: EIFS Color & Texture Matching
This guide explains what causes color and texture mismatches, how professional EIFS repair contractors approach the matching process, and what homeowners should expect from a quality repair plan. Understanding these factors helps property owners in Hamilton County, Marion County, and throughout Indiana make informed decisions about their exterior cladding.
Key Takeaways
- Color matching goes beyond paint chips. Finish coat batch variation, UV fading, surface chalking, and lighting conditions all affect how a repair blends with the original EIFS.
- Texture matching requires the right aggregate size and application technique. Dash, sand float, swirl, knockdown, and other finish profiles demand specific tools and consistent trowel pressure.
- A sample board mockup before the actual repair prevents costly surprises. Letting a test patch cure and checking it under different lighting conditions saves time and money.
- Old finishes fade unevenly based on sun exposure. North-facing walls retain color longer than south-facing walls, creating variation even on the same building.
- Proper surface preparation determines how well the new material bonds and blends. Cleaning, priming, and addressing hidden moisture issues come before any finish work.
- Whole-wall recoating is sometimes the most cost-effective option. When spot repairs would be visible due to extensive fading or texture differences, recoating an entire elevation produces better results.
Why EIFS Repairs Sometimes “Flash” or Stand Out
A patched area that looks noticeably different from the surrounding wall is said to “flash.” This happens for several reasons, and understanding each cause helps contractors and property owners plan repairs that blend.
6 Reasons EIFS Repairs Stand Out
Finish Coat Batch Variation
EIFS finish coats are manufactured in batches. Even when the same color formula is used, lot-to-lot variation can produce slight differences in shade or aggregate distribution. A finish coat produced in 2015 may not match one produced in 2025, even if both carry the same product name and color code.
Manufacturers maintain tight quality controls, but pigment sourcing, aggregate screening, and production conditions introduce small inconsistencies. When a contractor orders new material for a repair, that new batch may differ slightly from the original installation.
UV Exposure and Sun Fade Differences
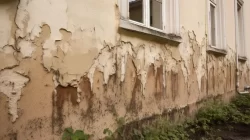
Sunlight breaks down pigments over time. A wall that faces south in Carmel, Fishers, or Zionsville receives more UV exposure than a north-facing wall on the same building. After ten years, the south wall may have faded noticeably while the north wall retains most of its original color.
Repairing a section of the faded south wall with fresh material creates an obvious contrast. The new patch appears darker or more saturated than the surrounding weathered finish. This UV exposure fading is one of the most common reasons repairs stand out.
Surface Chalking and Oxidation
Acrylic-based EIFS finishes can develop a chalky surface layer as they age. This oxidation discoloration changes the apparent color without changing the underlying pigment. Rubbing a hand across an older EIFS surface often leaves a powdery residue.
New finish material applied next to chalked surfaces appears more vibrant because it lacks that oxidized layer. Proper cleaning and sometimes a tinted primer coat help bridge this difference, but chalking remains a challenge for exact color matching.
Lighting and Metamerism Effects
Two colors that look identical under one light source can appear different under another. This phenomenon, called metamerism, affects EIFS repairs. A patch that matches perfectly under overcast skies may look noticeably different in direct morning sunlight or under evening light.
Professional contractors check color matches at multiple times of day. A raking light texture reveal (when sunlight hits the wall at a low angle) exposes texture differences that are invisible when the sun is directly overhead.
Texture Profile Differences
Beyond color, the physical texture of the finish coat affects appearance. EIFS finishes come in many profiles:
EIFS Texture Types & Matching Difficulty
| Texture Type | Description | Difficulty |
|---|---|---|
| Sand Float | Uniform, sandy texture | MODERATE |
| Dash Finish | Splattered, rough surface | HIGH |
| Swirl Finish | Circular trowel patterns | HIGH |
| Knockdown | Flattened peaks | MOD-HIGH |
| Skip Trowel | Irregular, Spanish-style look | VERY HIGH |
| Smooth Finish | Minimal texture | LOW |
Note: Smooth finishes show imperfections more readily despite lower matching difficulty.
Each profile requires specific tools and application methods. A contractor replicating a dash finish must match the aggregate size, the spray tip size, the air pressure, and the application distance. Even small variations produce visible differences.
Sheen Mismatch
The reflectivity of a finish coat affects how it appears under different lighting. A patch with a slightly higher or lower sheen than the surrounding wall catches light differently, creating a visible outline even when the color is correct.
Sheen mismatch often results from over-troweling during application. Too much pressure burnishes the surface, creating a shinier finish than intended. Insufficient troweling leaves a rougher, more matte appearance.
The Professional Color Matching Process
Experienced EIFS contractors follow a systematic approach to matching color and texture. This process begins before any repair materials are ordered.
Professional Color Matching: 5-Step Process
Step 1: Field Assessment and Documentation
The first step involves evaluating the existing finish under multiple conditions. Contractors examine the wall at different times of day, noting how light affects the apparent color and texture. They document:
- Overall fade level on each building elevation
- Surface chalking presence and severity
- Staining sources (rust bleed, tannin bleed, algae, hard water deposits)
- Existing texture profile and aggregate characteristics
- Previous repairs and their visibility
- Manufacturer (Dryvit, Sto, Senergy, Parex, Master Wall, Omega)
This assessment determines whether a spot repair can blend successfully or if broader recoating is necessary.
Step 2: Color Identification Methods
Several methods exist for identifying the exact color of an existing EIFS finish:
Manufacturer Records
When original installation records are available, contractors can reference the finish coat batch number and color formula. However, these records may not account for fading, and the original formula may have changed over years of production.
Visual Color Chip Comparison
Manufacturers provide color chip samples that contractors hold against the existing surface. This method works best in neutral lighting and serves as a starting point rather than a final determination.
Spectrophotometer Color Match
A spectrophotometer measures the exact wavelengths of light reflected from a surface, producing precise color data. This instrument accounts for fading and weathering, measuring what the wall looks like now rather than what color it was originally.
The measurement produces a Delta E color difference value. A Delta E below 1.0 is generally imperceptible to the human eye. Values between 1.0 and 2.0 are noticeable under close inspection. Values above 3.0 are obvious to most observers.
Delta E Color Difference Scale
Delta E measures color difference between two samples. Lower values indicate closer matches.
Target: Delta E below 1.0 for professional EIFS repairs.
Colorimeter Reading
A colorimeter is a more affordable alternative to a spectrophotometer. While less precise, it provides useful data for field color matching. Contractors take multiple readings across the surface to account for variation and average the results.
Step 3: Sample Board Mockup Creation
Before repairing the actual wall, experienced contractors create an on-site mockup panel. This sample board uses the proposed repair materials applied with the same techniques planned for the actual repair.
The mockup process involves:
- Preparing a small substrate sample (typically 2 feet by 2 feet)
- Applying base coat and mesh identical to the repair specification
- Applying the proposed finish coat at the correct thickness
- Allowing complete cure time (typically 24-72 hours depending on conditions)
- Evaluating the cured sample against the existing wall under multiple lighting conditions
This finish sample approval step catches mismatches before they become permanent. Adjusting the color formula, aggregate size, or application technique is far easier on a mockup than after a repair is complete.
Step 4: Understanding Wet vs. Dry Appearance
EIFS finish coats change color as they cure. The wet sample vs dry sample difference, sometimes called the drydown effect or cured color shift, must be anticipated.
Fresh finish typically appears darker and more saturated than the final cured color. Contractors familiar with their materials know how much shift to expect and account for this in their color selection. A finish that matches the existing wall while still wet will likely appear too light once fully cured.
Cure time varies based on:
Factors Affecting EIFS Cure Time
Cold slows curing
slows curing
drying rate
more slowly
- Ambient temperature (warmer conditions accelerate curing)
- Humidity levels (high humidity slows curing)
- Wind conditions (increases surface drying rate)
- Coating thickness (thicker applications cure more slowly)
A minimum 24-hour cure is typically required before evaluating color, though some products specify longer periods.
Step 5: Field Color Adjustment
When the mockup reveals a mismatch, contractors adjust the finish formula. Options include:

Jobsite Tinting
Some finish products accept universal colorant additions. Contractors add small amounts of colorant to shift the shade toward the target. This requires careful documentation of additive dosage control to replicate the adjustment consistently across larger batches.
Not all finish products are compatible with field tinting. Adding colorant to an incompatible product can cause adhesion problems, uneven color distribution, or accelerated weathering. Contractors verify universal colorant compatibility before making adjustments.
Manufacturer Custom Match
For critical matches, manufacturers can produce custom-formulated finish in small quantities. The contractor sends a sample of the existing finish (often a small piece removed from an inconspicuous area) to the manufacturer’s lab. The lab analyzes the sample and produces a matched formula.
This option costs more and requires lead time, but produces more reliable results than field tinting for difficult matches.
Tint Base Selection
EIFS finishes come in different base formulations. A white base accepts lighter tints, while a deep base is formulated for darker colors. Selecting the appropriate base for the target color affects both the match quality and the pigment load limits of the formula.
Texture Matching Techniques
Color matching alone does not guarantee an invisible repair. The physical texture must also match. This requires understanding the original application method and replicating it precisely.
Identifying the Existing Texture Profile
Before attempting to match a texture, contractors identify exactly what profile they are replicating. This assessment examines:
- Overall pattern (uniform, directional, random)
- Peak height and spacing (coarse, medium, fine)
- Aggregate visibility (embedded, partially exposed, prominent)
- Tool marks (trowel lines, spray patterns, sponge impressions)
Photographs taken at multiple angles, including shots with raking light, document the texture for reference during application.
Aggregate Size and Sand Gradation
The aggregate (sand or synthetic particles) in the finish coat largely determines texture. Aggregate size match requires using material with identical particle dimensions and distribution.
Finish coats are specified by aggregate size:
- Fine finish coat: Small aggregate for smooth, close-textured surfaces
- Medium finish coat: Mid-range aggregate for moderate texture
- Coarse finish coat: Large aggregate for heavy, pronounced texture
The sand gradation match involves not just the maximum particle size but the distribution of sizes. Two finishes with the same “coarse” designation from different manufacturers may have different gradation curves, producing different appearances.
Application Tools and Techniques
Different textures require different tools:
Texture Application Tools Reference
| Tool | Typical Use | Key Variables |
|---|---|---|
| Stainless Trowel | Smooth and light textures | Pressure, angle, number of passes |
| Plastic Trowel | Burnished surfaces | Timing, pressure |
| Sponge Float | Sand float finish | Dampness, circular motion |
| Hopper Gun | Dash and splatter textures | Tip size, air pressure, distance |
| Hawk & Trowel | Traditional application | Material consistency, trowel pressure |
The trowel-and-float finish combines multiple tools in sequence. Applying material with a trowel, then floating the surface with a sponge or plastic float produces specific textures that single-tool methods cannot replicate.
Spray-Applied Texture Variables
Spray-applied texture using a hopper gun involves multiple variables:
- Spray tip size selection: Larger tips produce larger droplets
- Air pressure adjustment: Higher pressure creates finer splatter
- Application distance: Closer application creates denser patterns
- Material consistency: Thicker material produces heavier droplets
Contractors running spray equipment for texture matching typically test settings on scrap material before applying to the repair area. Small adjustments in any variable change the resulting texture.
Trowel Technique Variables
Hand-applied textures depend on consistent technique:
Trowel Pressure Variation
Heavier pressure compresses material and reduces texture depth. Lighter pressure leaves more pronounced peaks. Matching existing texture requires the same pressure used in the original application.
Float Angle Variation
The angle at which the trowel contacts the surface affects texture. A trowel held nearly flat smooths the surface. A trowel at a steeper angle creates more pronounced patterns.
Working Speed
Moving too quickly can create tool chatter marks or inconsistent texture. Moving too slowly allows material to set before finishing, creating visible boundaries between passes.
Managing Edges and Transitions
The boundary between new and existing finish is the most critical area for texture matching. Several techniques help blend this transition:

Feathering the Edge
Rather than stopping abruptly, contractors feather the new material by gradually reducing thickness as they approach the existing finish. This creates a gradual transition rather than a sharp line.
Fade-Out Zone
A fade-out zone extends the new finish slightly onto the existing surface with minimal material. This blends the two areas and helps hide the repair boundary.
Blend Zone Perimeter
The blend zone perimeter defines how far the new finish extends beyond the damaged area. A larger blend zone provides more room for feathering but requires more material and labor.
Scuff Sanding
Light scuff sanding of the existing finish edge improves adhesion and helps the new material blend. This surface abrasion prep creates mechanical bond and reduces the visible line between old and new.
Surface Preparation for Successful Matching
The finish coat is only as good as the surface beneath it. Proper preparation ensures both adhesion and appearance.
Cleaning Requirements
Old EIFS surfaces accumulate contamination that interferes with adhesion and color matching:
Soft Bristle Wash Method
For routine cleaning before repair, a soft bristle brush with mild detergent removes surface dirt without damaging the finish. This low-pressure wash approach is safer than aggressive cleaning methods.
Pressure Washing Precautions
EIFS can be damaged by high-pressure washing. Excessive pressure forces water into joints and behind the finish, causing moisture problems. When pressure washing is necessary, contractors limit pressure to 400-600 PSI and maintain appropriate distance.
Detergent and Rinse
Cleaning agents must be rinsed completely. Detergent residue interferes with adhesion of new finish material. A neutralizing rinse ensures no chemical residue remains.
Addressing Staining Sources
Before applying new finish, contractors identify and address staining:
Common EIFS Staining Types & Corrections
| Staining Type | Common Source | Correction Approach |
|---|---|---|
| Rust Bleed-Through | Steel fasteners, flashing | Replace rusting components, prime |
| Tannin Bleed | Wood substrates, trim | Seal wood, prime stained areas |
| Algae/Mildew | Moisture, shade | Treat with cleaner, improve drainage |
| Hard Water Deposits | Irrigation overspray | Correct sprinkler pattern, clean deposits |
| Efflorescence | Moisture through substrate | Address moisture source, clean surface |
⚠️ Applying new finish over staining sources results in recurring stains. The underlying cause must be corrected first.
Applying new finish over staining sources results in recurring stains. The underlying cause must be corrected first.
Moisture Investigation
Hidden moisture in the wall assembly creates problems beyond staining. Water trapped beneath the finish can cause blistering, delamination, and mold growth.
Moisture Detection Methods
Pin Meter Moisture Reading
A moisture meter with pin probes measures moisture content in the substrate. Readings above acceptable levels indicate water intrusion that must be addressed before repair.
Probe Moisture Test
For deeper investigation, contractors may use probe moisture testing that reaches through the finish into the sheathing. This identifies hidden moisture that surface readings miss.
Infrared Scan
Thermal imaging reveals temperature differences associated with moisture. Wet areas appear cooler than dry areas, making moisture patterns visible.
This hidden moisture investigation is critical. Repairing EIFS over wet substrate traps moisture and guarantees future problems. Indiana Wall Systems’ approach includes moisture inspection before any EIFS water damage repair.
Primer and Bonding Considerations
Proper primer application improves adhesion and helps control color matching:
Primer Absorption Control
Different substrates absorb primer at different rates. Areas with higher base coat porosity absorb more primer, potentially affecting finish appearance. A skim coat before priming can equalize absorption.
Tinted Primer
A tinted primer coat matching the approximate finish color reduces the number of finish coats needed and helps achieve consistent color. This is particularly useful when repairing over previously painted surfaces.
Compatibility Verification
Primers must be compatible with both the existing substrate and the new finish material. Mixing products from different manufacturers can cause adhesion failures or chemical incompatibility.
The Repair Sequence for Optimal Matching
A systematic repair sequence produces the best color and texture match. Skipping steps or changing the order creates problems.
EIFS Repair Sequence for Optimal Matching
Damage Assessment and Scope Definition
The repair scope definition identifies exactly what needs repair and how far the work will extend. This assessment considers:
- Extent of visible damage
- Potential hidden damage (requiring probing or testing)
- Natural break points (corners, reveals, control joints)
- Matching feasibility given existing conditions
Limiting repairs to the minimum necessary area seems cost-effective but can result in more visible patches. Sometimes extending to a natural break (corner, window edge, control joint) produces better visual results.
Patch Perimeter Layout
Once scope is defined, contractors mark the patch perimeter on the wall. This layout considers:
Square Cut Patch Edges
Repairs with square cut edges bond better and blend more easily than irregular cuts. Straight lines along the existing base coat mesh provide clean bonding surfaces.
Keyed Edge Preparation
Creating a slight keyed edge (beveled cut that is wider at the back than the front) improves mechanical bond between old and new materials.
Break Line Strategy
Ending repairs at architectural reveals, expansion joints, or other natural break lines hides the repair boundary behind an existing visual feature.
Removing Damaged Material
Damaged finish, base coat, and sometimes insulation must be removed to sound material:
Finish Removal
The damaged finish is scored and removed, taking care not to disturb surrounding areas. The goal is clean edges with sound material remaining.
Base Coat and Mesh Assessment
If the base coat is damaged, it must also be removed. Sound base coat can remain, but the mesh must be exposed for proper overlap with new reinforcement.
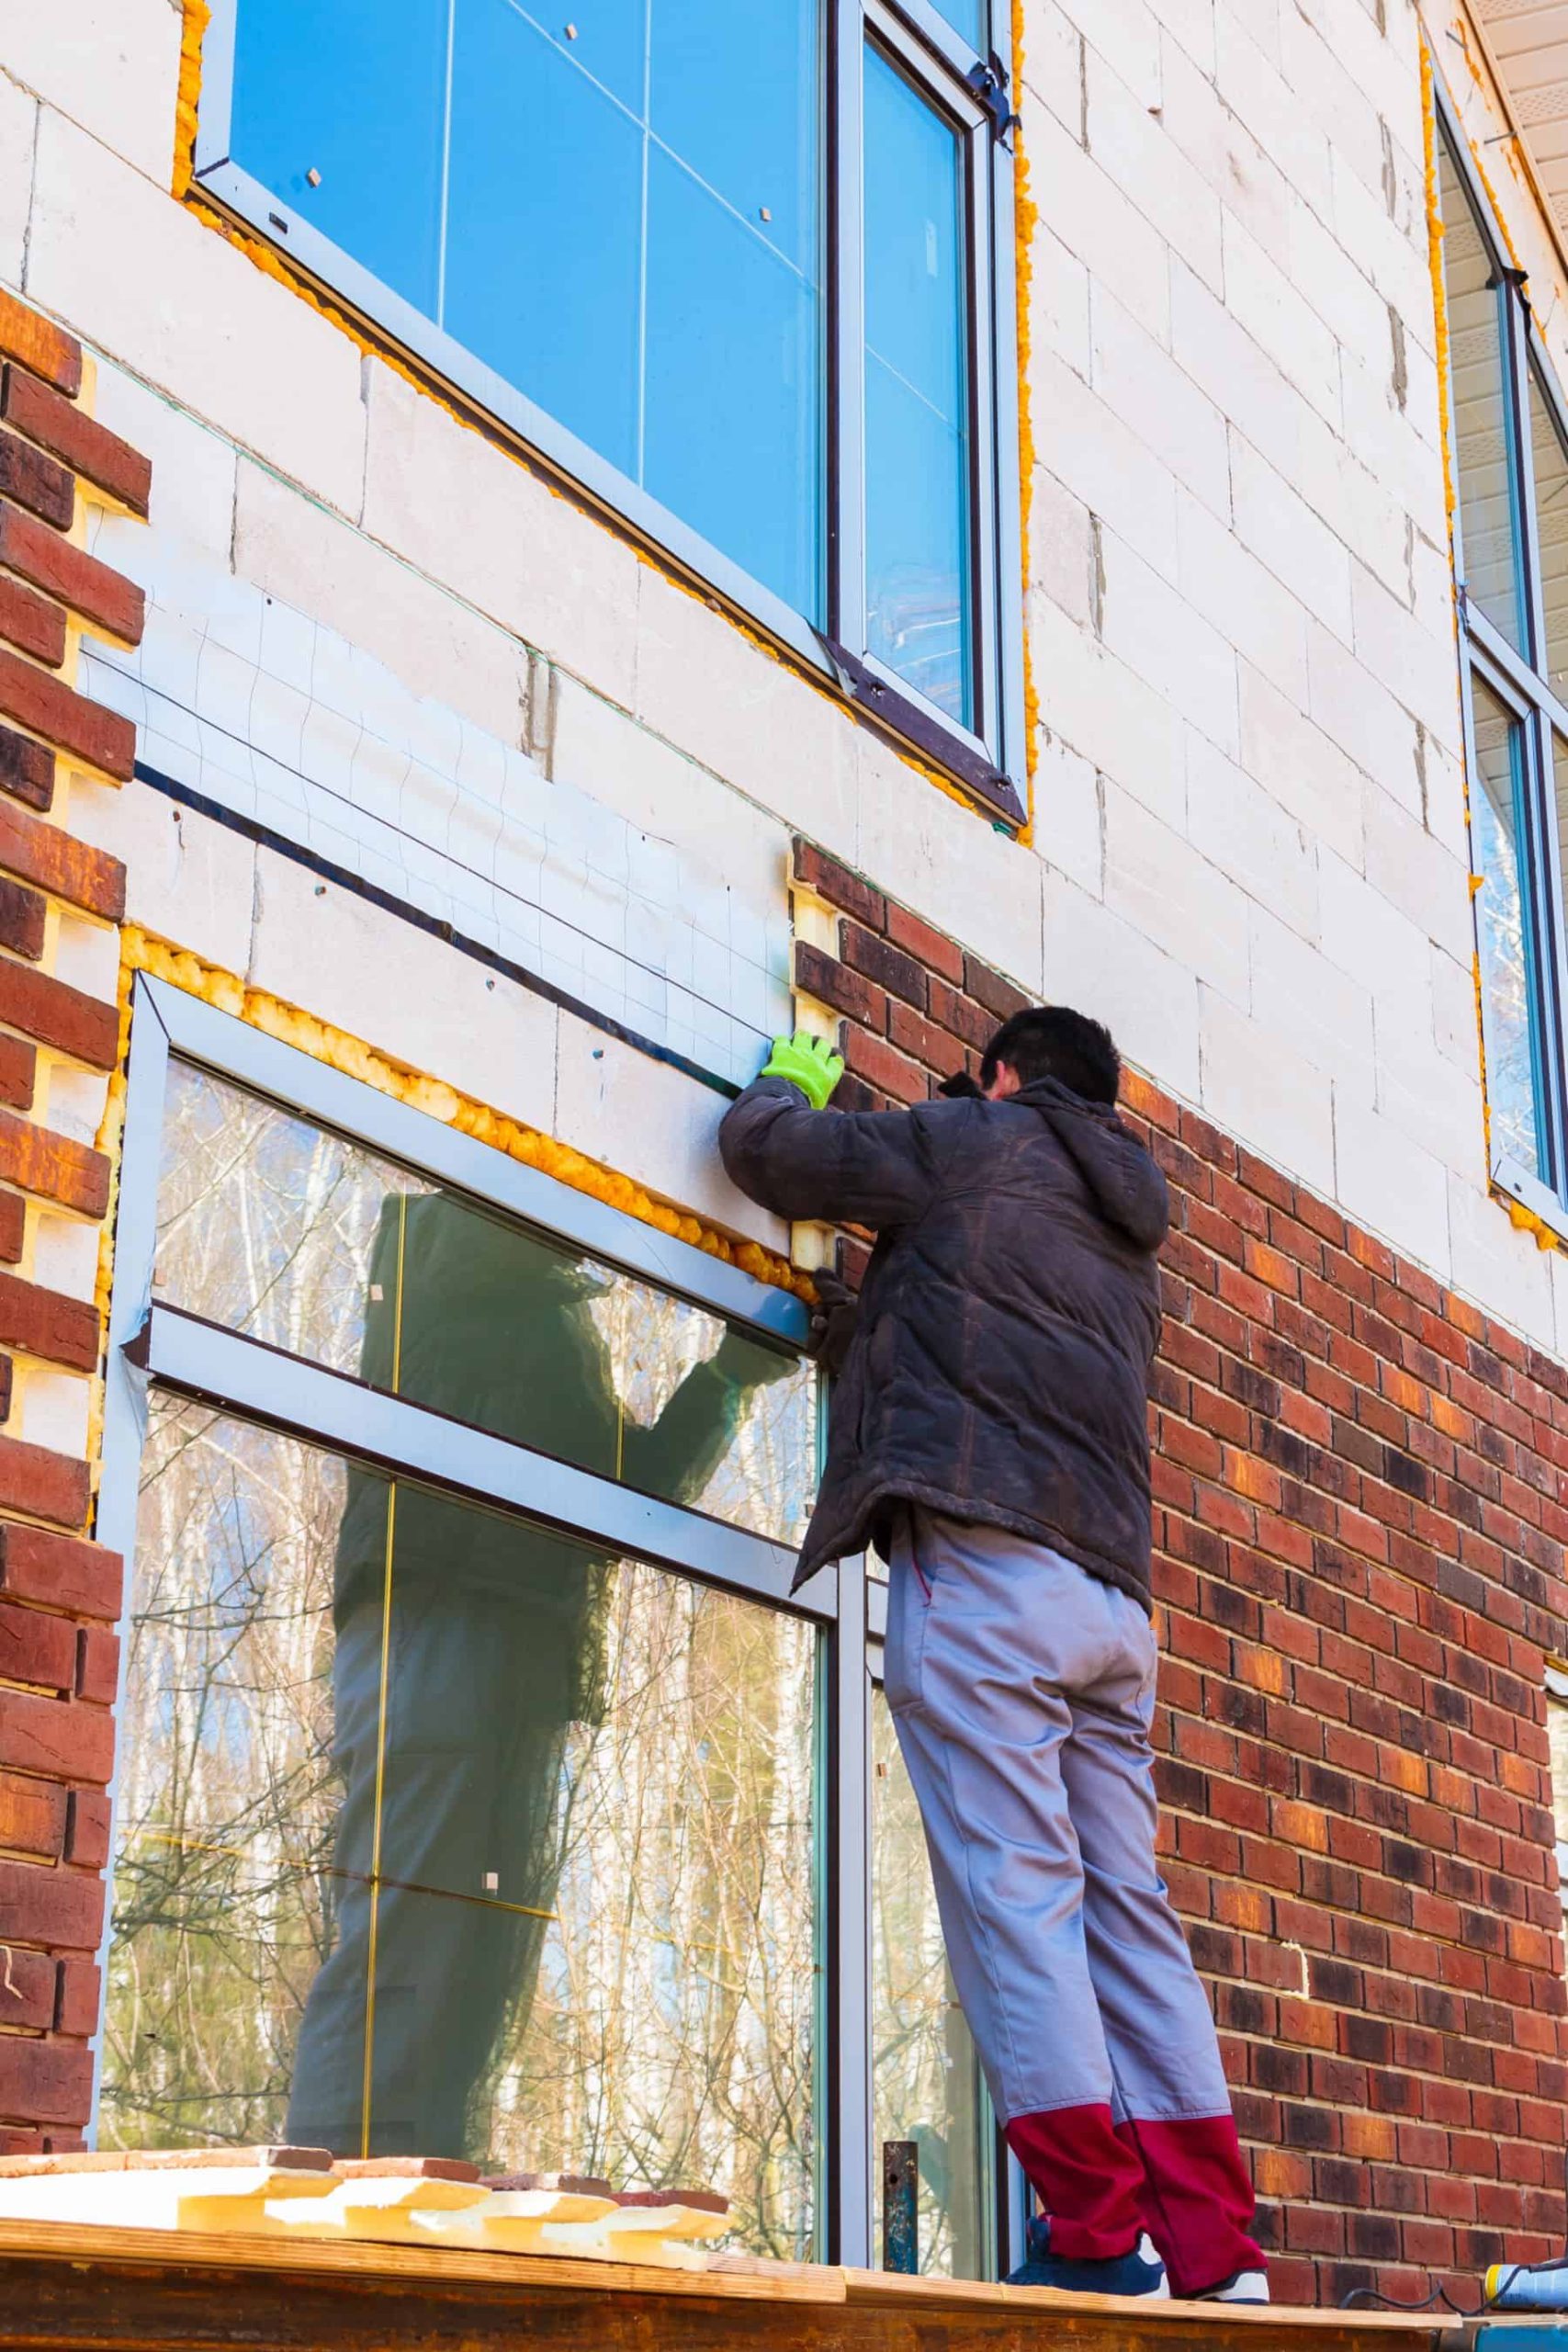
EPS Insulation Repair
Damaged EPS insulation board requires cutting back to undamaged material. New foam is shaped to fill the void. Rasp shaping technique with a coarse rasp produces proper contours. Hot wire foam cutting works for larger areas.
Mesh and Base Coat Application
New reinforcement mesh and base coat must integrate properly with existing material:
Mesh Overlap Pattern
New fiberglass mesh overlaps existing mesh by a minimum of 2.5 inches (some specifications require more). This overlap ensures continuous reinforcement across the repair boundary.
Mesh Ghosting Prevention
When mesh is visible through the finish coat, it creates “ghosting” or “mesh telegraphing.” Proper base coat thickness and two-pass finish application prevent this problem.
Base Coat Thickness Control
Consistent base coat thickness affects both structural performance and finish appearance. Variations in thickness create high spot telegraphing or low spot areas visible through the finish.
Finish Coat Application
The finish coat application brings together all the preparation and planning:
Material Preparation
Proper mixing is essential. Low-speed drill mixer operation prevents introducing air bubbles. Paddle scraping method ensures material is fully incorporated. Bucket-to-bucket boxing produces consistent color and texture across multiple containers.
Working Time Management
EIFS finishes have a limited working time window before they begin to set. In hot or windy conditions, this window shortens. Contractors must apply material quickly enough to maintain a wet edge but carefully enough to achieve proper texture.
Stop-Start Lap Marks
Stopping mid-wall creates visible lap marks or cold joints. Planning the application sequence to reach natural break points before stopping prevents these defects.
Consistent Technique
Maintaining consistent trowel pressure, float angle, and working speed across the entire repair produces uniform texture. Variation creates visible differences.
Cure Time and Protection
After application, the repair needs proper curing:
Minimum Cure Period
Most EIFS finishes require 24-72 hours before exposing to rain or other moisture. Some products specify longer periods. The manufacturer’s cure requirements supersede general guidelines.
Weather Protection
Rain exposure during cure can wash out pigment, damage texture, and cause adhesion failure. Protecting fresh repairs with temporary coverings prevents weather damage.
Contamination Prevention
Windborne dust landing on wet finish embeds in the surface, affecting both appearance and performance. Jobsite cleanliness control and masking adjacent surfaces prevent contamination.
When Spot Repairs Cannot Match: Whole-Wall Options
Sometimes spot repairs cannot achieve an acceptable match. Extensive fading, severe texture differences, or multiple previous repairs create conditions where broader approaches work better.
Spot Patch vs. Recoat Analysis
A spot patch vs recoat analysis compares:
Spot Repair vs. Whole-Wall Recoat
| Factor | Spot Repair | Whole-Wall Recoat |
|---|---|---|
| Initial Cost | Lower ✓ | Higher |
| Match Quality | Variable | Consistent ✓ |
| Long-Term Appearance | Patch may become visible | Uniform aging ✓ |
| Future Repair Ease | Compounds challenges | New baseline ✓ |
When acceptable match tolerance cannot be achieved with spot repairs, recoating produces better long-term value.
Blend Coat Strategy
A blend coat extends new finish partially across existing surfaces to hide repair boundaries. Rather than recoating an entire wall, the blend coat covers enough area to incorporate repairs within a zone that fades gradually into the original finish.
This approach costs more than spot repair but less than full recoating. It works best when damage is concentrated in one area rather than scattered across a large surface.
Elevation-Wide Recoating
When repairs are scattered across a wall face, elevation-wide recoating often makes sense. Recoating an entire north, south, east, or west face provides:
- Uniform color across the elevation
- Consistent texture throughout
- Natural break points at corners
This approach uses corners as natural breaks where the slight color difference between the recoated elevation and adjacent elevations is expected and less noticeable than patch boundaries mid-wall.
Whole-Building Recoating
For buildings with extensive repairs needed or severe overall fading, whole-building recoating provides the most consistent results. While the highest initial cost, this approach:
- Eliminates all matching challenges
- Provides consistent appearance
- Creates documented baseline for future maintenance
- May be required before property sale in some markets
Property managers considering major facade work often find that EIFS commercial wall system repair combined with full recoating provides the best return on investment.
Regional Considerations for Central Indiana
Climate and environmental factors specific to Central Indiana affect EIFS color and texture matching.
Indiana Climate Effects
Indiana’s four-season climate creates specific challenges:
Central Indiana Climate Challenges for EIFS
Common Staining Issues in Indiana
Indiana properties face specific staining challenges:
Hard Water Deposits
Indiana’s mineral-rich water leaves calcium deposits on EIFS surfaces. Irrigation overspray creates patterns that must be corrected before repairs.
Roof Runoff Staining
Missing or improperly designed kickout flashing allows roof runoff to wash down EIFS walls, creating staining patterns. Indiana Wall Systems addresses kickout flashing details as part of repair planning.
Downspout Splash Staining
Where downspouts discharge near EIFS walls, splash patterns create localized staining and potential moisture damage.
Service Areas and Matching Expertise
Indiana Wall Systems serves homeowners and property managers throughout the region, including Hamilton County, Marion County, Hendricks County, Johnson County, Boone County, and Morgan County. Specific communities served include:
- Carmel and the Village of West Clay
- Fishers and Noblesville
- Zionsville and Whitestown
- Indianapolis and Speedway
- Greenwood and Franklin
- Plainfield and Avon
- Brownsburg and Danville
- Mooresville and Martinsville
Each area has specific building stock and environmental conditions that affect EIFS matching. Local knowledge helps contractors anticipate challenges.
Owner Expectations and Acceptable Match Tolerance
Setting realistic expectations helps homeowners evaluate repair results fairly.
What “Perfect Match” Actually Means
No repair matches perfectly under all conditions. Acceptable match tolerance accounts for:
- Slight color variation visible only under specific lighting
- Minor texture differences noticeable only on close inspection
- Normal variation present in the original installation
A well-executed repair should be unnoticeable during normal viewing from typical distances (10+ feet). Under close inspection or specific lighting, some variation may be detectable.
Factors Affecting Match Quality
Several factors affect achievable match quality:
Time Since Installation
Older installations have more accumulated fading and weathering. A finish installed 20 years ago presents greater matching challenges than one installed 5 years ago.
Original Installation Quality
Variations in the original installation (inconsistent texture, multiple batches used) make precise matching more difficult. Repairs match the existing variation rather than an ideal standard.
Previous Repairs
Each previous repair adds another variable. Matching new work to patched areas that were themselves imperfect compounds the challenge.
Damage Extent
Larger damaged areas are generally easier to match than small patches. Small repairs concentrate attention on a limited zone, making minor differences more noticeable.
Color Match Warranty Considerations
EIFS manufacturers provide limited warranties on color matching. These color match warranty limits typically specify:
- Matching to current production (not original installation)
- Variation within specified Delta E range
- Exclusions for fading, weathering, and site conditions
Understanding these limitations helps owners assess what warranties cover and what falls outside warranty scope.
Maintaining Repair Records
Good photo documentation before and after repair helps with future maintenance:
Saved Batch Labels
Keeping the batch labels from finish materials used in repairs allows future contractors to reference the same product lot.
Saved Color Formula
Recording the exact color formula (including any field adjustments) provides a baseline for future matching.
Saved Finish Sample Board
Retaining the mockup panel used for matching approval provides a physical reference for comparison as the repair ages.
This color record for future repairs simplifies subsequent maintenance and establishes a future patch matching plan.
What a Professional EIFS Repair Plan Includes
When evaluating contractors, property owners should expect specific elements in a repair proposal:
What to Expect in a Professional EIFS Repair Proposal
- Visual evaluation of all elevations
- Moisture testing of damaged areas
- Documentation of existing texture
- Identification of staining sources
- Products by manufacturer and name
- Color formula or matching method
- Aggregate size and texture profile
- Primer and bonding agent specs
- On-site mockup creation
- Cure time before evaluation
- Approval criteria and process
- Adjustment protocol if needed
- Inspection points during work
- Final walkthrough procedures
- Multiple lighting condition checks
- Punch list resolution process
- Before and after photographs
- Material records for future reference
- Maintenance notes for homeowner
- Warranty documentation
Pre-Repair Assessment
- Visual evaluation of all elevations
- Moisture testing of damaged areas
- Documentation of existing texture and condition
- Identification of staining sources and needed corrections
Material Specification
- Specific products by manufacturer and product name
- Color formula or matching method
- Aggregate size and texture profile
- Primer and bonding agent specifications
Sample Approval Process
- On-site mockup creation
- Cure time before evaluation
- Approval criteria and process
- Adjustment protocol if initial match is rejected
Application Specification
- Surface preparation requirements
- Mesh overlap and base coat specifications
- Finish application technique
- Weather requirements and limitations
Quality Control
- Inspection points during work
- Final walkthrough procedures
- Final walkthrough lighting check at multiple times
- Punch list resolution process
Documentation Deliverables
- Before and after photographs
- Material records for future reference
- Maintenance note for homeowner on care requirements
- Warranty documentation
Indiana Wall Systems provides this level of detail in repair proposals, helping property owners understand exactly what they are purchasing and what results to expect. For a full evaluation, property owners can request an EIFS inspection before planning repairs.
Maintaining Repaired EIFS for Long-Term Match Retention
After repair, proper maintenance helps the patched area age consistently with surrounding surfaces.
Cleaning Schedule
Regular cleaning frequency helps maintain uniform appearance:
- Annual visual inspection for staining or damage
- Soft bristle cleaning every 2-3 years
- Low-pressure washing only when needed
- Spot treatment of staining as it appears
Avoid aggressive cleaning methods that could affect the repair differently than original surfaces.
Touch-Up Limitations
Touch-up kit products have limitations:
- They match current stock, not aged installations
- Small touch-ups can be more visible than larger repairs
- Repeated touch-ups create patchwork appearance
When significant touch-up is needed, reassessing the matching approach may be more effective than continuing small corrections.
Monitoring for Recurring Problems
Repaired areas should be monitored for signs of underlying issues:
- Cracking returning to same location
- Staining recurring despite correction
- Moisture signs (blistering, soft spots)
- Delamination at repair boundaries
Early detection of recurring problems allows correction before major damage occurs. Signs that EIFS feels soft to the touch indicate moisture problems requiring immediate attention.
Need EIFS Repair That Actually Blends?
Indiana Wall Systems brings 26+ years of experience to every color and texture match. We create mockups, get your approval, and deliver results that disappear into your existing finish.
Serving Carmel, Fishers, Zionsville, Indianapolis, Greenwood, Plainfield & Central Indiana
Frequently Asked Questions
How long does it take for an EIFS repair to fully blend with the surrounding wall?
New repairs typically appear slightly different immediately after completion due to the cured color shift as material dries. Most repairs blend better after 30-60 days as the new finish weathers slightly and reaches equilibrium with surrounding surfaces. Full blending may take one seasonal cycle.
Can any contractor match EIFS texture, or does it require special training?
Texture matching requires experience with EIFS-specific materials and application techniques. Contractors should be trained by EIFS manufacturers and have documented experience with the specific texture profile being matched. General painting contractors typically lack the specialized skills needed for quality texture matching.
Why does my EIFS repair look darker than the surrounding wall?
Fresh finish material appears darker because it lacks the surface chalking and UV fading present on older surfaces. Additionally, if evaluated before full cure, the repair may still be experiencing drydown effect. Properly matched repairs typically lighten and blend over several weeks to months.
Is it better to repair small areas or recoat an entire wall section?
The answer depends on the extent of damage, the age and condition of existing finish, and the achievable match quality. Multiple small repairs on a heavily faded wall often look worse than a single larger repair or recoating. A professional assessment helps determine the most cost-effective approach for good long-term results.
What happens if I am not satisfied with the color match after a repair?
Quality contractors include a mockup sign-off process before performing actual repairs. This approval step catches mismatches early. If concerns arise after completion, options include additional blending, tinted topcoating, or in some cases, recoating larger areas. Discussing expectations and approval processes before work begins prevents disputes.
How does Indiana weather affect EIFS color matching?
Indiana’s freeze-thaw cycling, humidity variations, and seasonal temperature extremes affect both repair timing and long-term matching. South-facing walls fade faster than north-facing walls. Repairs should be scheduled during appropriate weather windows (generally 40-90°F with low humidity) for best results.
Can color matching be guaranteed?
No contractor can guarantee perfect invisible repair under all conditions. Acceptable match tolerance acknowledges that slight variations may be detectable under specific lighting or close inspection. Professional contractors should specify what match quality they target and what variations are normal and acceptable.
Working with Indiana Wall Systems
Indiana Wall Systems brings over 26 years of EIFS and stucco experience to every repair project. The company serves residential homeowners, commercial property managers, and homebuilders throughout Central Indiana and Northern Kentucky.
“Every repair starts with understanding what we’re matching,” explains Jeff Johnson, CEO of Indiana Wall Systems. “We take the time to evaluate the existing finish, create mockups, and get approval before we start. That extra step prevents callbacks and keeps customers happy.”
The company’s approach includes:
- Detailed pre-repair assessment with moisture testing
- Sample board mockup approval process
- Documented material specifications for future reference
- Clear communication about achievable results
- Follow-up inspection after cure
For property owners in Carmel, Fishers, Zionsville, Indianapolis, Greenwood, Plainfield, and surrounding communities, Indiana Wall Systems provides professional EIFS repair services with attention to color and texture matching that maintains curb appeal and protects property value.
To schedule an assessment of your EIFS repair needs, contact Indiana Wall Systems at (765) 341-6020 or visit the contact page to request a free estimate.