Revive Your Building’s Exterior: Your Ultimate Guide to Fixing EIFS Water Damage
Introduction to EIFS Repair for Water Damage
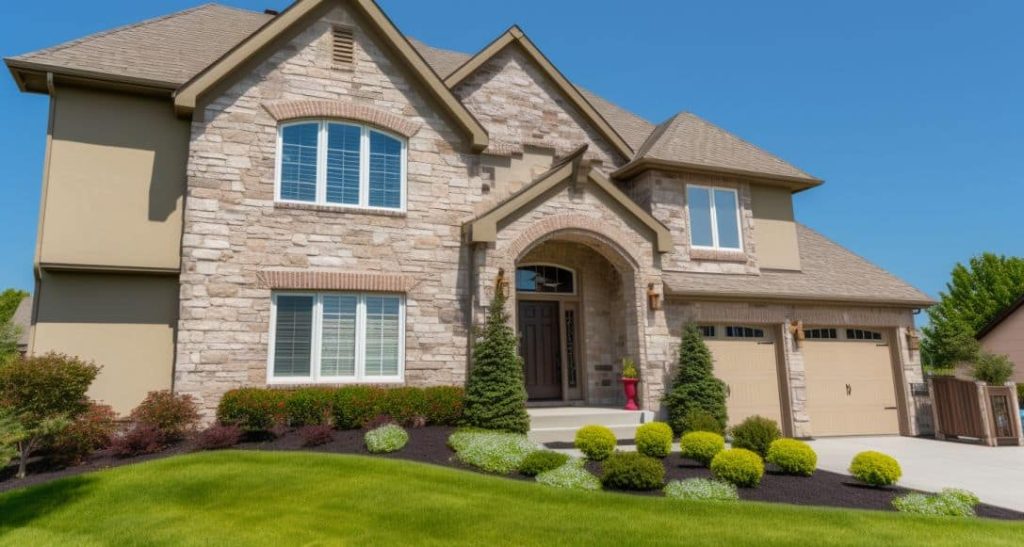
Exterior Insulation and Finish Systems (EIFS) is a multi-layered exterior wall cladding that has become increasingly popular in both residential and commercial construction over the last few decades. EIFS offers superior insulation compared to traditional stucco or siding, allowing for reduced energy costs and increased comfort.
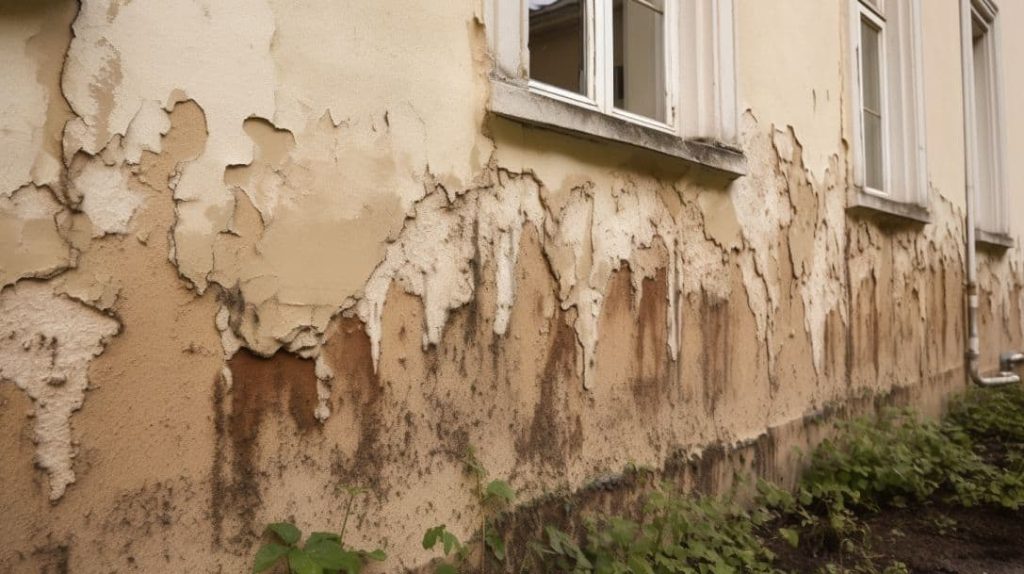
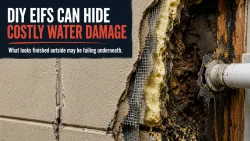
However, EIFS is vulnerable to water intrusion damage if not properly maintained or repaired. Water that penetrates behind the EIFS finish can lead to rot, mold growth, interior damage, and structural issues if left unchecked. That’s why it’s crucial to understand proper EIFS repair techniques when water damage occurs.
In this comprehensive guide, we’ll walk through the necessary steps for DIY and professional EIFS repair after water damage. We’ll cover:
- Common causes of water damage in EIFS systems
- Techniques for identifying, locating, and accessing the damage
- Structural repairs to framing or sheathing
- Full EIFS removal and replacement vs. spot repair options
- Matching textures and colors when installing new EIFS
- Tips for prevention and maintenance
Armed with this knowledge, you’ll be prepared to tackle EIFS water damage repair with confidence. Let’s get started!
Understanding EIFS and Water Damage
Before we dive into the repair process, it’s important to understand what exactly EIFS is and how water can cause damage.
EIFS consists of five key components:
- Insulation Board – Usually expanded polystyrene foam that provides thermal insulation and water resistance.
- Base Coat – Cement-based layer that encapsulates the insulation boards and embeds the reinforcing mesh.
- Reinforcing Mesh – Fiberglass mesh embedded in the base coat to provide strength.
- Finish Coat – Acrylic-based finish layer that provides texture, color, and protection from weathering.
- Drainage Plane – Water-resistive barrier behind the EIFS that allows drainage and evaporation of any moisture that gets behind the EIFS.
How Water Can Damage EIFS
Water intrusion can occur through a variety of ways:
- Cracks or Damage – Cracks, holes, or deterioration in the EIFS finish allow water to penetrate the system. This is the most common cause of water damage.
- Faulty Flashing – Improper or failing flashing around windows, doors, roof lines, etc. enables water to get behind the EIFS and bypass the drainage plane.
- Poor Caulking/Sealing – Gaps around windows, lights, pipes, or other penetrations can let water enter if not properly caulked and sealed.
- Inadequate Drainage – Insufficient slope, clogged weep holes, or lack of drip edges can lead to water buildup behind the EIFS with no way to drain properly.
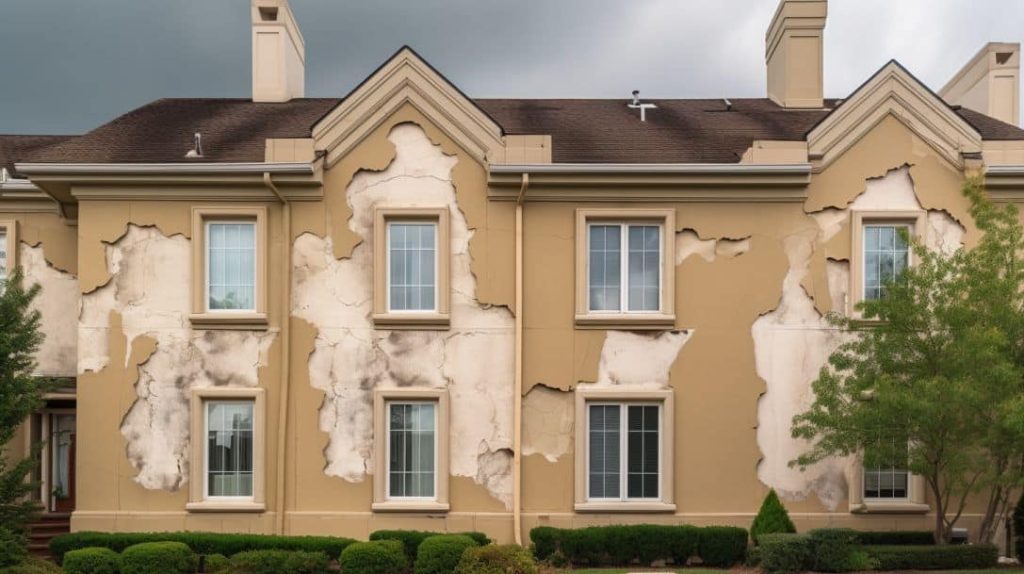
Common Signs of Water Damage in EIFS:
- Discoloration or staining on exterior finish
- Cracks, blisters, bulges and de-bonding of finish from insulation
- Wet insulation boards or water trapped behind EIFS
- Interior water stains or leaks
- Rotting or water damage to structural sheathing
- Mold or mildew growth
- Compromised or rusted flashing
- Pest or insect infestation behind EIFS
If any of these issues are identified, it likely indicates water intrusion that requires repair.
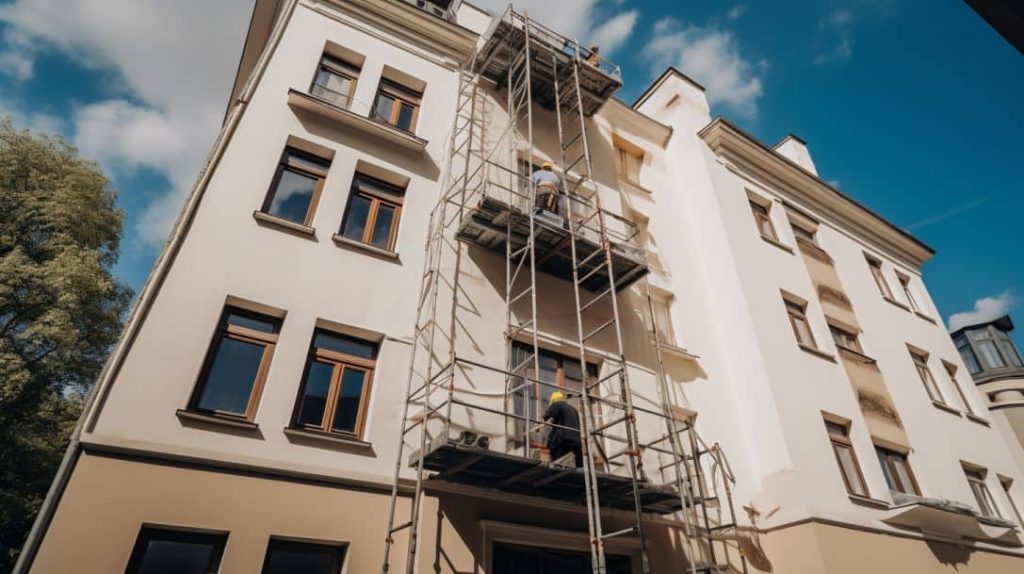
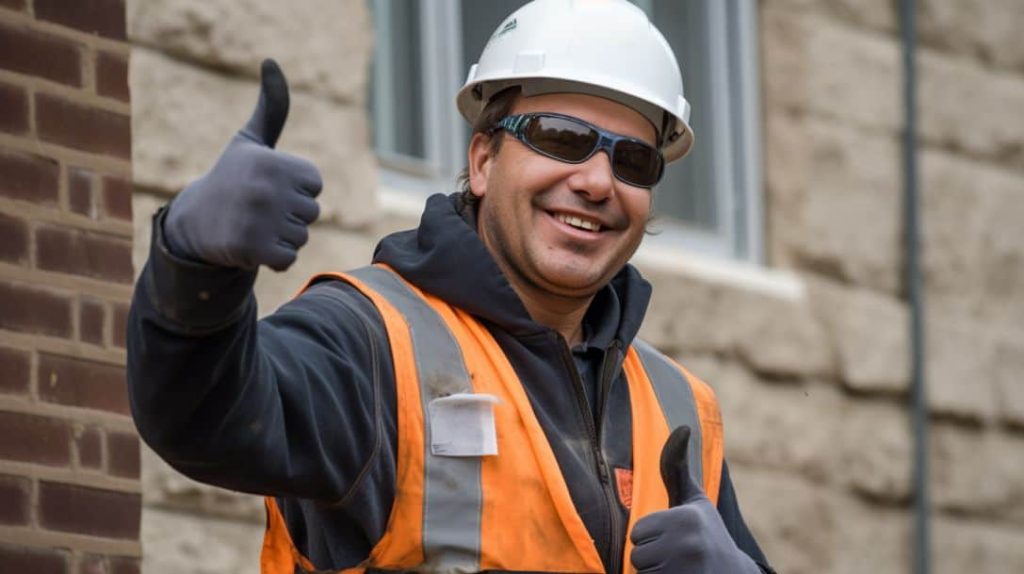
The Importance of Professional EIFS Repair
While small areas of EIFS water damage may be repairable as a DIY project, we strongly recommend engaging a professional EIFS repair contractor for most situations.
Trying EIFS repair without proper training and experience can lead to subpar fixes that fail prematurely or exacerbate existing moisture issues. Professional contractors have the specialized expertise to:
- Properly diagnose the extent of damage – A full inspection helps identify any hidden areas needing repair.
- Assess structural impacts – Contractors can determine if water damage has compromised any structural framing or sheathing and address it appropriately.
- Remove and replace EIFS safely – Improper removal can damage the water barrier or structure. Professionals have the right tools and methods.
- Install new EIFS correctly – The system must be re-installed to manufacturer specs to regain proper insulation and drainage.
- Match existing finishes – Contractors have the products and techniques to blend repairs to the existing EIFS texture and color.
- Provide warranties – Professional installation and materials often come with extended warranties. DIY repairs won’t.
Consulting a qualified EIFS repair contractor provides peace of mind the issues have been fully resolved. Your investment will be protected by their expertise.
Preparing for EIFS Repair

Prior to beginning any repairs, make sure you have the necessary materials on hand and take proper safety precautions.
Materials Typically Needed:
- Drop cloths & masking materials
- Pry bars, shovels, or drills for removal
- Sawzall or utility knives for cutting insulation
- Snips for cutting the mesh
- Grinders for smoothing cut edges
- Caulk guns & quality sealants
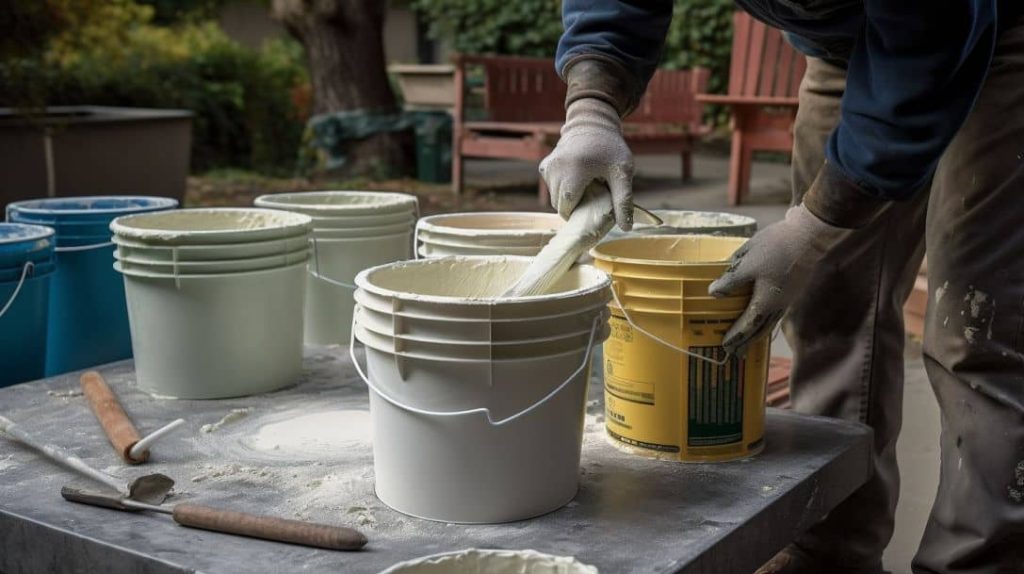
- Quality mesh, base coat, and finish coat materials
- Mixing buckets & mixers for compounds
- Paint brushes, rollers, spray equipment for finishes
- Temporary structural bracing materials
Safety Precautions:
- Use caution when removing or cutting EIFS materials – debris should be controlled
- Wear proper PPE – gloves, goggles, masks to limit exposure to dust and chemicals
- Contain and dispose of any hazardous waste properly
- Prevent falls when working at height – use proper ladders, lifts, and harnesses
- Ventilate the work area adequately if interior repairs are also required
- Check for electrical or other utilities in the work area and shut off as needed
- Use temporary structural supports to shore areas with compromised framing or sheathing
Proper planning, materials, and safety steps are vital for effective EIFS water damage repair.
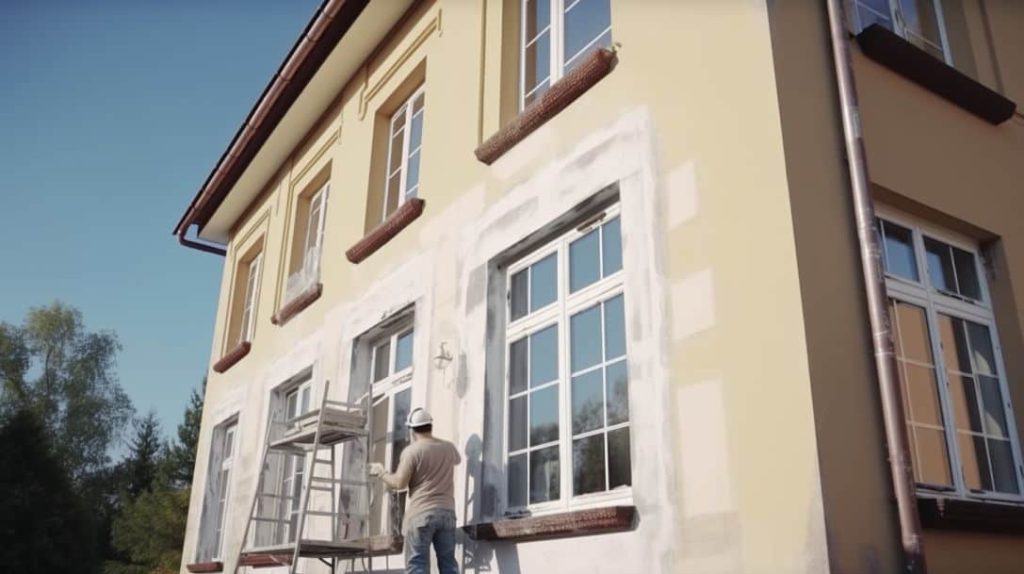
Step 1: Identify and Locate the Water Damage
Pinpointing the areas of EIFS needing repair is an important first step. This involves inspecting both the interior and exterior.
Inspecting the Exterior:
- Methodically examine the entire EIFS facade up close for any cracks, holes, de-lamination, bulges, staining, or deterioration. Probe any suspect areas with a knife to check for soundness.
- Pay particular attention around windows, doors, lighting fixtures, pipes, or anywhere that flashing and end dams transition from the EIFS to other materials.
- Also inspect trim, caulking, expansion joints, and other transition areas for gaps that may be allowing water intrusion.
- Check any slopes, window sills, or architectural features to ensure water can properly drain off the EIFS and not become trapped.
- Use a ladder to inspect the upper areas of the facade that are difficult to see from the ground.
Checking for Interior Damage:
- Thoroughly examine interior finishes for any signs of water staining, peeling paint, mold/mildew, or bulging surfaces. This may indicate EIFS water penetration to areas beyond just the exterior facade.
- Inspect the attic or crawl spaces if accessible to check for dripping, wet or damaged insulation, deteriorated framing, or compromised sheathing.
- Identify any areas on interior walls or ceilings that correspond with water-damaged areas on the exterior EIFS facade.
Careful inspection and mapping of all water-damaged areas on the interior and exterior is crucial for proper diagnosis of the repairs needed.
Step 2: Address Any Structural Damage
Before repairing the EIFS itself, address any structural framing or sheathing that has been compromised by water damage. Attempting EIFS repair with uncorrected structural deficiencies will lead to continued problems.
Repairing Damaged Framing:
- Inspect wood framing members for rot, deterioration, mold, insect damage, or compromised strength. Tap wood with a hammer to identify soft, spongy areas needing replacement.
- For minor damage, wood epoxies or consolidants may be used to strengthen wood. For extensive deterioration, framing members will need partial or full replacement.
- Use temporary bracing and supports when removing deteriorated framing to prevent collapse or shifting.
- Cut out and replace damaged sections with new, pressure-treated framing lumber of the same dimensions. Secure with lags, bolts, or metal framing connectors as the code requires.
Replacing Rotted Sheathing:
- Remove any sheathing panels, plywood, or OSB that have softened, delaminated, or shown rotting from water exposure.
- Cut back damaged sheathing until you reach intact, solid material. Scrape or sand to remove any residual mold or decay.
- Cut replacement structural sheathing to size, match thickness and type of original material. Seal edges and backs of panels.
- Secure new sheathing with proper fasteners and spacing for shear strength. Stagger panel joints properly.
With structural repairs made, you can move on to addressing the EIFS cladding itself.
EIFS Repair vs Full Replacement: An In-Depth Comparison
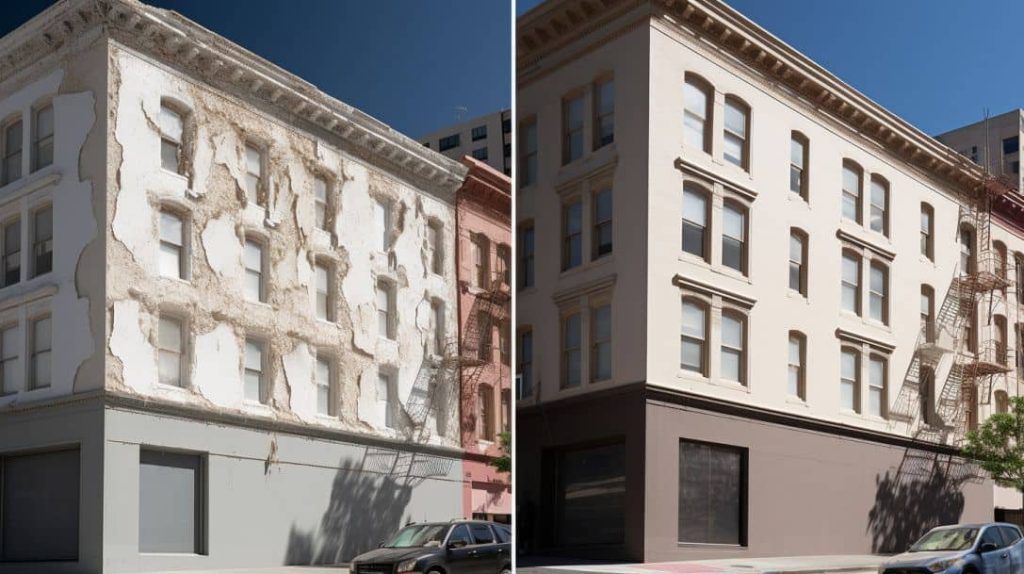
Once water damage areas are identified, an important consideration is determining whether spot repair or full EIFS replacement is the better solution. Here are some key factors in deciding between repair or full tear-off and replacement:
EIFS Repair Considerations
- Smaller contained areas of damage may be repairable
- Significantly lower cost compared to full replacement
- Preserves any undamaged insulation and materials
- Matches existing EIFS finish and color
- Suitable if underlying structure/sheathing is intact
- Quicker than full replacement
Potential Drawbacks of Repair
- Identifying the full extent of damage difficult
- Risk of problems reoccurring if source not addressed
- Does not fix fundamental flaws in existing EIFS installation
- No warranty on repaired areas
- Materials and textures may not match perfectly
Full EIFS Replacement Considerations
- Addresses deterioration across the entire facade
- Allows inspection and correction of underlying issues
- Ensures proper installation per manufacturer specs
- Qualifies for warranties on new EIFS system
- New uniform appearance and long-lasting materials
- Stops chronic moisture issues at their source
Potential Drawbacks of Full Replacement
- Much higher cost than repair
- More complex logistically
- More disruptive for occupants if exterior access required
- Some demolition waste is not recyclable
In summary:
- For minor, isolated damage – repairs may suffice
- For extensive water damage or underlying flaws – full replacement is better
Consult a professional EIFS contractor to determine the best solution for your specific situation.
Step 3: Remove Damaged EIFS
Once you’ve decided on the repair approach, properly removing damaged areas of EIFS is next.
Proper Removal Techniques:
- Clearly mark out the boundaries of EIFS removal with tape, chalk lines or lumber guides. Make clean, straight cuts around the removal area.
- Take precautions to protect adjacent materials like flashings, windows, or finishes you’re preserving.
- Carefully cut through the finish layer using utility knives or a Sawzall with a face-shield guard. Prevent jagged edges.
- Break off and pry away finish coat material in damaged sections. Shovels, pry bars, or drills can help.
- Inspect the exposed insulation boards – remove any that are cracked, distorted, wet or deteriorated.
- Cut insulation level and plumb using a sharp serrated knife. Grind any rough edges smooth.
- Inspect the water-resistive barrier for intactness. Patch any torn areas with like material.
- Avoid damaging the structural sheathing or framing if at all possible.
Dealing with Mold or Mildew:
- Protect yourself with PPE when handling areas with mold – gloves, masks, and goggles are recommended.
- HEPA vacuum any remaining cavities to remove loose spores and minimize airborne spread.
- Consider mold-killing primers or anti-microbial sealants on affected sheathing/framing.
Proper removal and disposal of damaged EIFS materials is key before continuing with repair steps.
Step 4: Repair or Replace Insulation
After removing damaged sections, the insulation layer will need to be addressed before installing new EIFS:
Ensuring Proper Insulation:
- Verify R-value meets current energy code requirements if replacing large areas. Typically R-5 to R-7 per inch is recommended in climate zones 5-8.
- Choose insulation thickness to match existing, accounting for any needed R-value increase. Common options are 1”, 1.5” or 2” foam boards.
- Use unfaced, expanded polystyrene insulation boards. Do not use bead-board or paper-faced products behind EIFS.
Replacing Damaged Insulation:
- Infill small gaps or holes in existing insulation with spray foam for thermal bridging prevention.
- Cut and adhere new foam boards over damaged areas using thinset mortar or foam adhesive per manufacturer.
- Around windows, doors and penetrations, maintain proper shiplap joints, sealing, backwrapping, etc.
- Stagger all insulation board joints and keep tight to perimeter framing. Gap spacing no more than 1/16”.
Properly installing the insulation layer is critical for the EIFS water and thermal protection.
Step 5: Install New EIFS System
With insulation repaired, it’s time to install the new EIFS cladding components:
Choosing the Right EIFS System:
- For repaired areas, use EIFS products intended for retrofit applications from a reputable manufacturer.
- Ensure compatibility with existing EIFS materials if only doing partial replacement.
- Consider specialty impact-resistant or waterproofing EIF systems if exposure warrants it.
Proper Installation Techniques:
Water-Resistive Barrier (WRB):
- Ensure WRB is intact, seamless, and securely transitioned into flashings. Repair any damaged areas.

Insulation Adhesive:
- Apply adhesive to the backs of boards per manufacturer specs for a secure bond to the substrate.
Base Coat:
- Embed fiberglass mesh reinforcing fabric into wet base coat, overlapping seams minimum 2.5”.
- Double wrap meshed base coat 4-6” onto adjacent EIFS edges.
- Apply the second base coat layer, fully embedding the mesh once dry.
Finish Coat:
- Primer and finish must be compatible and from the same manufacturer as the base coat.
- Mix finishes thoroughly before application. Apply per spreading rate instructions.
- Float finish to match surrounding texture. Allow proper curing time between coats.
Proper installation techniques ensure that repaired EIFS will be durable, well-integrated, and weather-tight.
Step 6: Apply Finishing Touches
The final step is applying those all-important finishing touches for a seamless repair appearance:
Proper Caulking and Sealing:
- Clean all transition areas and apply the backer rod as needed for proper sealant joint sizing.
- Use quality polyurethane or silicone sealants compatible with EIFS finishes. Avoid acrylic latex caulks.
- Tool sealant with smooth, consistent joints and full contact to both sides of the joint.
Matching EIFS Texture and Color:
- Blend texture variations using additional finish coat stippling or smoothing.
- Work paints and stains into the finish coat for an indistinguishable color match.
- Use multiple coloring admixtures or coats if needed to match the repaired area to the surrounding EIFS color.
- If matching proves difficult, consider recoating surrounding areas to achieve uniformity.
With careful finishing work, repairs will be practically invisible and restore the EIFS facade’s weathertight performance.
Maintenance and Prevention Tips
To get the longest service life from your EIFS and avoid repeat repairs, consider these maintenance best practices:
Regular Inspections:
- Visually inspect the EIFS facade up-close at least annually for any cracks, damage, or deterioration.
- Check caulking joints around all windows, lights, trim, and penetrations. Look for gaps or wear.
- Inspect flashings, overlaps, and integrations with other building materials. Ensure water management details remain intact.
Proper Drainage and Caulking Maintenance:
- Clear any blocked weep holes or clogged drip edges to maintain drainage.
- Re-apply fresh caulk at necessary joints or transitions to prevent water intrusion. Use quality sealants.
Utilizing EIFS Waterproofing Systems:
- Consider applying specialty waterproof EIFS finishes or breathable membranes for added protection in vulnerable areas.
- Fluid-applied flashings can provide redundancy to vulnerable transitions and connections.
With diligent inspection and maintenance, costly EIFS water damage can be avoided.
Conclusion
EIFS water damage repair can seem intimidating. But armed with the techniques covered in this guide, both DIYers and contractors can take on these repairs with confidence. The keys are the proper diagnosis of all damaged areas, addressing underlying structural issues, complete EIFS removal in deteriorated sections, and methodical replacement per manufacturer guidelines.
With careful finishing work to blend repaired areas into the surrounding EIFS, no evidence of the repair will remain. Your building will regain its weathertight, energy-efficient exterior.

For assistance from the EIFS repair experts at Indiana Wall Systems, call (765) 341-6020 or contact us online today. Our decades of hands-on experience can restore your EIFS facade quickly and professionally. Protect your valuable investment – call us for an evaluation and repair quote!
FAQs
What are the most common causes of water damage in EIFS?
Cracks, holes, or deterioration in the EIFS finish, faulty or failing flashing, poor caulking around openings, and inadequate drainage are the most common causes allowing water intrusion that can damage EIFS.
How can I identify water damage in my EIFS walls?
Look for exterior signs like staining, cracks, bulges, and blisters, and also inspect the interior for water stains, leaks, mold, or pest intrusion. Checking attics/crawlspaces for dripping and examining sheathing conditions is also recommended.
Is EIFS repair always better than full replacement?
For minor, contained damage, repairs may suffice. But for extensive deterioration across the facade or underlying installation flaws, full EIFS replacement is likely the better solution. Consult a professional for the best recommendation.
What are the keys to proper EIFS repair?
The keys include fully removing deteriorated sections, repairing any structural issues, installing new EIFS components per manufacturer specs, and blending finishes to match existing textures/colors. Proper detailing at transitions and openings is also critical.
How can I help prevent future EIFS water damage?
Regular close inspections, maintaining proper drainage paths clear of debris, re-caulking openings, and considering specialty waterproofing EIFS products or membranes can all help minimize moisture issues over the long term.