Repairing stucco cracks on the outside of your house can be a straightforward process with the right approach and tools. How to repair stucco is a question many homeowners face, but it’s manageable with a bit of patience and careful work. Proper maintenance of your stucco exterior not only improves your home’s appearance but also prevents further damage. Here’s a detailed guide on how to effectively address stucco cracks to ensure your home remains beautiful and well-protected.
Understanding Stucco Cracks
Stucco, a popular and durable siding material, can develop cracks over time due to various factors such as settling, temperature fluctuations, and moisture exposure. Identifying and addressing these cracks early can prevent more serious damage and costly repairs down the line.
How To Repair Stucco Cracks Effectively
- Assessing The Severity of Stucco Cracks
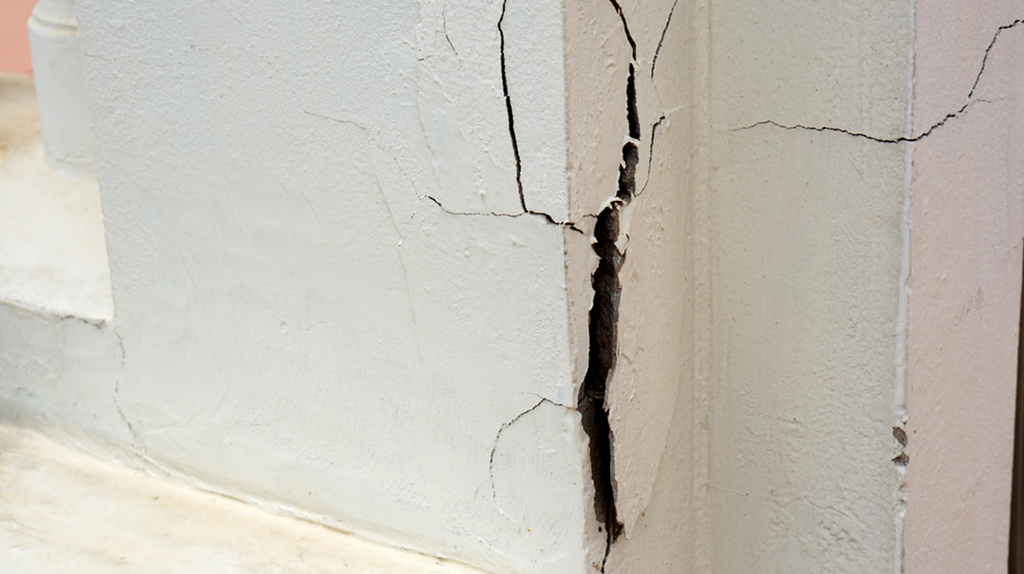
Before starting any repair work, it’s essential to assess the severity of the cracks in your stucco. Small hairline cracks are typically cosmetic and can be repaired easily. However, larger cracks might indicate underlying structural issues that need professional attention. Carefully inspect the cracks, looking for any patterns or signs of water damage that could suggest a more serious problem. Understanding the extent of the damage will help you decide on the best course of action.
Larger cracks and significant damage often require a more thorough inspection and potentially a different repair approach. If you’re unsure about the severity, consider consulting with a professional to avoid missing any hidden issues. Accurate assessment ensures that the repair work you undertake will be effective and long-lasting, preventing further complications.
- Gathering Necessary Tools and Materials
Having the right tools and materials is crucial for a successful stucco repair. Essential tools include a putty knife, trowel, wire brush, and a mixing bucket. You’ll also need stucco repair compound, bonding agent, and paint that matches your existing exterior. Gathering everything beforehand saves time and ensures you’re prepared for each step of the process. Proper preparation allows for a smoother workflow and better results.
- Preparing the Stucco Surface
Preparation is a critical step in ensuring a successful stucco repair. Start by cleaning the area around the crack thoroughly to remove any dirt or debris. Use a wire brush to scrub the surface gently but effectively. This cleaning process ensures that the bonding agent and repair compound adhere properly. Skipping this step can result in a weak repair that doesn’t last.
Once the surface is clean, inspect it again for any loose pieces that might need removal. Preparing the surface might seem tedious, but it is vital for achieving a durable and seamless repair. A well-prepared surface ensures that the subsequent steps proceed smoothly and the repair holds up well over time.
- Cleaning the Cracked Area
Cleaning the cracked area is essential for the bonding agent and repair compound to adhere correctly. Use a wire brush to remove any loose stucco, dirt, and debris from the crack and surrounding area. A clean surface allows for better adhesion and a more durable repair. This step might seem small, but it’s crucial for the overall success of the repair.
Ensure the area is completely dry before proceeding to the next step. Moisture can interfere with the bonding process and compromise the repair. Thorough cleaning and drying are simple but vital steps in preparing the crack for repair. They ensure that the materials you apply will bond well and last longer.
- Removing Loose Stucco Pieces
Removing loose stucco pieces is necessary to create a stable base for the repair. Use a putty knife to carefully pry away any loose or damaged stucco from around the crack. This step helps to prevent further cracking and ensures that the repair compound adheres properly. Be gentle to avoid causing additional damage to the surrounding stucco.
After removing the loose pieces, clean the area again to ensure it’s free of debris. This preparation helps to create a smooth, stable surface for the repair compound. Taking the time to remove loose stucco ensures that the repair is more effective and durable, providing a solid base for the new material.
- Applying Bonding Agent
Applying a bonding agent to the stucco crack helps to ensure a strong adhesion between the old and new stucco. Use a brush to apply the bonding agent to the cleaned crack, following the manufacturer’s instructions. The bonding agent acts as a primer, enhancing the adhesion of the repair compound. This step is crucial for achieving a long-lasting repair.

Allow the bonding agent to dry completely before applying the repair compound. The drying time can vary, so check the product instructions for guidance. Proper application of the bonding agent sets the stage for a successful repair, ensuring the new stucco bonds well with the existing material.
- Mixing Stucco Repair Compound
Mixing the stucco repair compound to the right consistency is essential for a smooth application. Follow the manufacturer’s instructions to mix the compound, aiming for a thick, paste-like consistency. Too runny and it won’t adhere well; too thick and it will be difficult to apply smoothly. Properly mixed compound ensures a durable and seamless repair.
- Filling The Stucco Crack
Filling the stucco crack with the repair compound is the next crucial step. Use a trowel to apply the compound into the crack, pressing firmly to make sure it fills completely. Smooth the surface as you go to avoid any air pockets, which can weaken the repair. Proper filling ensures that the crack is fully sealed and the repair is durable.
Apply the compound in layers if the crack is deep, allowing each layer to dry before adding the next. This method helps to ensure a thorough and solid repair. Filling the crack properly is essential for achieving a smooth and long-lasting result. It restores the integrity of the stucco and prevents further damage.
- Smoothing the Surface
Smoothing the surface of the repaired stucco crack ensures a seamless blend with the existing wall. Use a trowel to smooth the repair compound, making sure it’s level with the surrounding stucco. This step is crucial for achieving a professional finish. Proper smoothing enhances the appearance and durability of the repair.
Take your time to achieve a smooth surface, as this affects the final look after painting. A well-smoothed repair blends better and is less noticeable. Smoothing the surface properly ensures that the repair is not only effective but also aesthetically pleasing. It prepares the area for the final finishing touches.
- Allowing the Stucco Repair Compound
Allowing the stucco repair compound to cure properly is essential for a strong and durable repair. Follow the manufacturer’s instructions for curing time, which can vary depending on the product and weather conditions. Proper curing ensures that the repair sets fully and can withstand the elements. Skipping this step can lead to a weak repair that fails over time.
Ensure the repaired area is protected from rain and direct sunlight during the curing process. Proper curing is a simple but critical step in achieving a long-lasting stucco repair. It ensures that the material bonds well and maintains its strength and integrity.
- Applying A Second Layer
Applying a second layer of stucco repair compound helps to ensure a thorough and durable repair. Once the first layer has cured, apply a second layer to fill any remaining gaps and smooth the surface further. This step provides additional strength and ensures the repair blends well with the existing stucco. Proper application of the second layer enhances the overall quality of the repair.
Smooth the second layer carefully to ensure a seamless finish. A well-applied second layer helps to hide the repair and match the texture of the surrounding area. This step is essential for achieving a professional-looking result that lasts. It reinforces the repair and improves its appearance.
- Texturing the Repaired Area
Texturing the repaired area to match the existing stucco ensures a seamless blend. Use a texture tool or brush to mimic the pattern of your existing stucco while the repair compound is still wet. This step is crucial for achieving a uniform look. Proper texturing helps the repaired area blend in with the rest of the wall, making the repair less noticeable.
Take your time to match the texture as closely as possible. A well-textured repair enhances the overall appearance and makes the repair almost invisible. Texturing properly ensures that the repaired area looks natural and cohesive. It completes the repair process and prepares the area for painting.
- Painting the Repaired Stucco
Painting the repaired stucco to blend with the exterior is the final step in achieving a seamless repair. Choose a paint that matches the color of your existing stucco. Apply the paint in thin, even coats, allowing each coat to dry before applying the next. Proper painting ensures that the repaired area blends well with the rest of the wall.

A well-painted repair enhances the overall appearance and protects the stucco from weather damage. Take your time to ensure even coverage and a smooth finish. Painting properly is essential for achieving a professional-looking result that lasts. It completes the repair and restores the aesthetic appeal of your home.
Enhance Your Home’s Exterior with Indiana Wall Systems’ Expertise
Protect and beautify your home with our professional services at Indiana Wall Systems. We excel in not only stucco solutions, but also exterior painting, ensuring your home’s exterior not only looks stunning but is also well-protected against the elements. Our skilled contractors use only top-quality materials to deliver exceptional results.
In addition, our Exterior Insulation and Finish Systems (EIFS) provide excellent insulation, fire resistance, and aesthetic appeal. Trust Indiana Wall Systems for reliable, certified services backed by a ten-year warranty. Contact us today for all your stucco and EIFS needs.