Why Classic Plaster Moldings Still Belong In Modern Indiana Homes
Walk into any historic Indianapolis home, and your eyes naturally travel upward. The ceiling meets the wall with a graceful curve of ornate plaster crown molding. Delicate acanthus leaves, egg-and-dart patterns, and dentil details catch the light. These architectural features tell a story of craftsmanship that modern mass production simply cannot replicate.
Indiana Wall Systems has spent over 25 years working with plaster repair and restoration across central Indiana. The team has restored countless historic plaster moldings in homes from Carmel to Louisville. One thing remains constant: authentic plaster moldings turn ordinary rooms into extraordinary spaces.
This guide covers everything property owners need to know about plaster moldings. From understanding different types and profiles to installation methods, maintenance, and working with skilled artisans, this resource helps homeowners make informed decisions about adding timeless elegance to their interiors.
Key Takeaways
- Authentic plaster moldings last 100+ years with proper maintenance, far outlasting polyurethane (20-30 years) and MDF alternatives (30-50 years).
- Crown molding scale should match ceiling height: 3-5 inches for 8-foot ceilings, 5-7 inches for 10-foot ceilings, and 8+ inches for 12-foot or vaulted ceilings.
- Two installation methods exist: cast plaster (pre-made in workshops) works best for repetitive ornaments and restoration matching, while run-in-place molding suits long continuous runs and irregular surfaces.
- Material choice matters by location: use traditional gypsum or lime for formal areas, lime plaster or GRG for moisture-prone bathrooms, and match original materials for historic restoration projects.
- Plaster moldings add measurable property value, with buyers paying premiums for period-appropriate architectural details in competitive markets.
- Professional installation prevents costly mistakes: out-of-square corners, ceiling irregularities, and proper substrate preparation require experienced ornamental plasterers.
- Routine maintenance is simple: annual inspections, regular dusting, and maintaining 40-50% indoor humidity keep plaster moldings looking their best for generations.
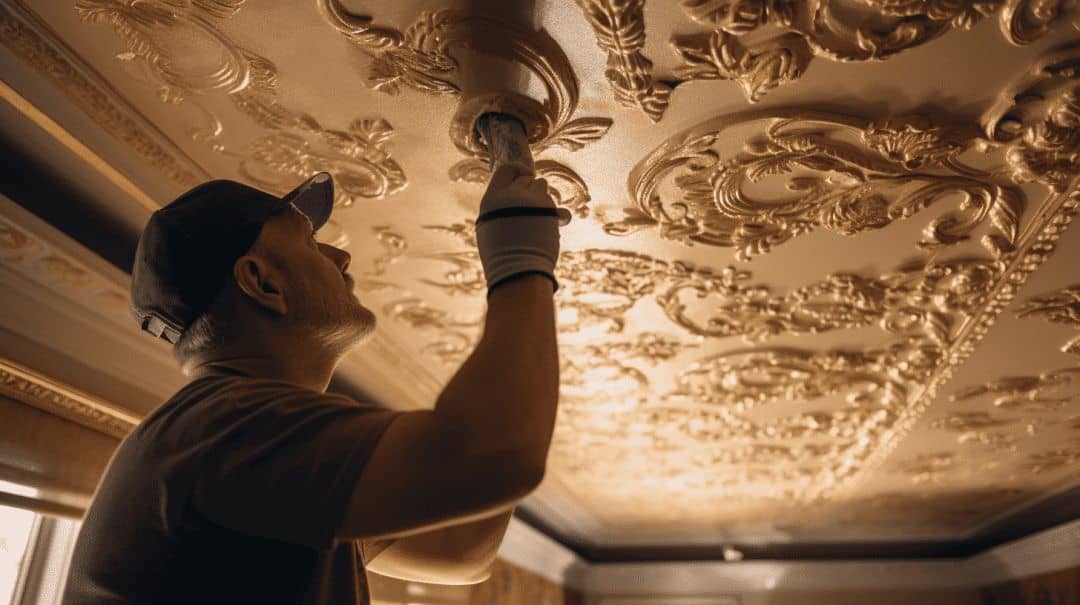
The Lasting Value of Plaster Moldings
Indiana Wall Systems brings 22+ years of plaster expertise to every project
What Are Plaster Moldings and Why Do They Matter?
Plaster moldings are decorative architectural elements made from gypsum plaster, lime plaster, or modern alternatives like glass fiber reinforced gypsum (GFRG). These trim pieces create visual transitions between walls and ceilings, frame doorways and windows, and add dimensional interest to flat surfaces.
Unlike factory-made polyurethane or MDF alternatives, authentic plaster moldings carry weight, density, and depth that synthetic materials cannot match. The material itself responds to light differently, casting subtle shadows that change throughout the day. This characteristic alone explains why designers and architects continue specifying plaster trim for high-end residential projects.
The History Behind the Craft
Ornamental plasterwork dates back thousands of years. Ancient civilizations used lime plaster to create decorative elements in temples and palaces. The craft reached its peak during the Georgian, Victorian, and Beaux-Arts periods when skilled plasterers created elaborate ceiling roses, cornices, and frieze panels that defined architectural styles.
Central Indiana contains numerous examples of period-correct molding profiles from these eras. Historic districts in Indianapolis, Zionsville, and Carmel feature homes with original plaster moldings that have survived over a century. Many property owners seek professional interior plastering to restore these valuable details. These architectural elements add significant value, both monetary and aesthetic, to the properties that retain them.
Plaster Moldings vs. Modern Alternatives
Property owners often face decisions between authentic plaster and manufactured alternatives. Here is how the options compare:
Material Comparison: Plaster vs. Alternatives
See how authentic plaster stacks up against synthetic options
| Feature | Authentic Plaster | Polyurethane/Foam | MDF/Wood |
|---|---|---|---|
| Weight & Feel | Heavy, Substantial ✓ | Lightweight | Medium |
| Detail Crispness | Excellent ✓ | Good | Good |
| Fire Resistance | Excellent ✓ | Poor (melts) | Poor (burns) |
| Longevity | 100+ Years ✓ | 20-30 Years | 30-50 Years |
| Repairability | Fully Repairable ✓ | Replace Sections | Replace Sections |
| Sound Dampening | Good ✓ | Minimal | Minimal |
| Initial Cost | Higher Investment | Low-Moderate | Moderate |
| Value Added | Significant ✓ | Minimal | Moderate |
For homeowners serious about quality and long-term value, authentic plaster moldings remain the superior choice. The initial investment pays dividends through durability, repairability, and genuine character that buyers recognize.
Types of Plaster Moldings for Indiana Homes
Understanding the various types of plaster moldings helps homeowners choose appropriate options for their architectural style and room function. Each type serves specific purposes while contributing to overall design cohesion.
Types of Plaster Moldings at a Glance
Each type serves specific purposes in your home’s architecture
Crown Molding
Crown molding creates the transition between walls and ceilings. This is the most visible and impactful type of interior trim. Profiles range from simple cove shapes to elaborate multi-piece assemblies with dentil details, egg-and-dart patterns, and acanthus leaf ornaments.

The spring angle (the angle at which crown molding sits against the wall and ceiling) affects both appearance and installation complexity. Common spring angles include 38 degrees, 45 degrees, and 52 degrees. Larger crown profiles typically use steeper spring angles, creating more dramatic shadow lines.
Crown molding scale matters tremendously. A room with 8-foot ceilings calls for crown molding between 3 and 5 inches in height. Rooms with 10-foot ceilings can accommodate 5 to 7-inch profiles. Grand spaces with 12-foot ceilings or vaulted ceiling crown details may feature crown molding 8 inches or larger.
Crown Molding Scale by Ceiling Height
💡 Rule of thumb: Crown height should be roughly 1 inch per foot of ceiling height
Cornice and Frieze Work
Plaster cornice refers to the entire assembly of moldings at the ceiling-to-wall transition. While crown molding describes a single profile, cornice work often combines multiple elements including the crown, frieze band, and various enrichments.
The frieze is the flat band that sits below the crown profile. Frieze panels may feature:
- Plain surfaces for simple designs
- Decorative frieze molding profiles
- Painted murals or stenciled patterns
- Applied ornaments like swags or medallions
Georgian cornice and Federal style trim typically feature proportional relationships between crown height, frieze width, and wall height. Following these classical proportions creates rooms that feel balanced and purposeful.
Ceiling Roses and Medallions
Plaster ceiling roses (also called ceiling medallions or plaster ceiling centerpieces) mark the center of formal rooms. Traditionally designed to frame chandeliers, these circular or oval ornaments add visual interest to ceiling planes.
Sizes range from modest 12-inch diameter pieces suitable for bedrooms to elaborate 36-inch or larger medallions for formal living rooms and dining rooms. Designs incorporate classical motifs like acanthus leaves, Greek key frets, guilloche patterns, and bead-and-reel molding.
Wall Panel Molding and Wainscoting
Plaster panel molding creates frames on wall surfaces, dividing large expanses into visually manageable sections. This technique, often called picture frame molding, references classical French interior design.
Raised panel wainscoting in plaster covers the lower portion of walls, typically one-third to two-thirds of wall height. Components include:
- Plaster baseboard (also called plaster skirting board)
- Dado rail or chair rail at the wainscoting top
- Panel molding frames within the field
- Optional raised center panels
This treatment protects walls from chair backs and foot traffic while adding architectural sophistication. Indianapolis homeowners often request panel molding for formal living rooms, dining rooms, and entry foyers.
Door and Window Casings
Door casing molding and window casing molding frame openings throughout the home. The terms architrave and plaster architrave describe these frame assemblies in classical architecture.
Key components include:
- Architrave molding: The main vertical and horizontal frame pieces
- Plaster rosette blocks or corner block molding: Decorative squares at corners
- Plaster plinth blocks: Wider base pieces where casing meets floor

Period homes often feature elaborate door and window casings with fluted molding, reeded molding, or carved ornament. Matching existing plaster profiles during restoration requires careful profile duplication service from experienced ornamental plasterers.
Specialty Elements
Beyond standard trim, plaster artisans create specialty elements including:
- Plaster corbels and plaster brackets: Supporting ornaments beneath shelves or mantels
- Plaster pilasters: Flat decorative columns applied to walls
- Plaster capitals: Ornate tops for pilasters and columns
- Plaster column wraps: Covering structural columns with classical detailing
- Plaster niche trim: Framing recessed display areas
- Arched opening trim in plaster: Custom curved casings
- Keystone ornaments: Decorative center pieces above arches
Plaster Materials: Understanding Your Options
The material composition of plaster moldings directly affects durability, appearance, and suitability for specific applications. Property owners benefit from understanding these options before specifying work.
Gypsum Plaster
Gypsum plaster (sometimes called plaster of Paris) remains the most common material for interior moldings. Mined gypsum undergoes heating to remove water, creating a powder that re-hydrates and hardens when mixed with water.
Advantages of gypsum plaster:
- Fast setting time (speeds production)
- Smooth, dense finish
- Excellent fire resistance
- Takes paint well
- Relatively affordable
Limitations:
- Water-soluble once set
- Not suitable for exterior use
- Requires controlled humidity environments
For most interior applications in Indiana homes, gypsum-based products perform excellently. Standard crown moldings, ceiling medallions, and decorative ornaments typically use gypsum formulations.
Lime Plaster
Lime plaster and lime putty formulations predate gypsum products by centuries. The material starts as limestone, undergoes heating, slakes with water, and cures through carbonation (absorbing carbon dioxide from air).
Advantages of lime plaster:
- Superior moisture resistance
- Allows substrate breathability
- Self-healing minor cracks
- Natural antimicrobial properties
- Authentic historical appearance
Considerations:
- Longer cure times (weeks rather than days)
- Requires skilled application
- Higher material costs
- Less common among modern contractors
Lime plaster excels for restoration projects in historic homes. The material matches original 19th-century moldings while providing longevity that gypsum cannot match in certain conditions.
Properties needing decorative plastering styles often benefit from lime plaster’s authentic character.
Glass Fiber Reinforced Gypsum (GFRG/GRG)
Modern GFRG and GRG products embed glass fiber reinforcement within gypsum matrix. This creates lightweight plaster molding with enhanced performance characteristics.

Benefits include:
- Significantly reduced weight (important for large pieces)
- Greater impact resistance
- Reduced breakage during shipping and handling
- Faster installation for commercial projects
GFRG products suit:
- Large ceiling medallions (where weight concerns matter)
- Commercial installations with tight schedules
- Applications requiring long unsupported spans
- Projects prioritizing installation speed
The material costs more than standard gypsum but saves labor in many applications.
Reinforcement Materials
Traditional and modern reinforcements strengthen plaster moldings:
- Hemp fiber reinforcement: Historical method, adds tensile strength
- Jute scrim reinforcement: Fabric reinforcement for large cast pieces
- Burlap reinforcement: Similar function to jute
- Glass fiber reinforced gypsum: Modern standard for production pieces
- Casting reinforcement fiber: Chopped fibers mixed into plaster
Reinforcement proves especially important for:
- Large ceiling roses and medallions
- Pieces requiring transport
- Moldings subject to vibration or movement
- Applications with limited mechanical attachment
Plaster Layer Systems
Traditional three-coat plaster application applies to molding substrates:
- Scratch coat plaster: First layer keyed to the substrate (wood lath, metal lath, or expanded metal lath)
- Brown coat plaster: Second layer providing bulk and contour
- Finish coat plaster: Final layer accepting texture or ornament
Understanding these layers helps property owners recognize quality work and communicate effectively with contractors.
Sand finish plaster provides textured surfaces while smooth finish plaster creates sleek contemporary looks. Both integrate with adjacent polished plaster trim or specialty finishes like Venetian plaster adjacent trim.
Regional Considerations for Central Indiana
Indiana’s climate presents specific challenges for plaster moldings. Understanding regional factors helps homeowners maintain installations and plan appropriate projects.
Humidity and Temperature Cycles
Central Indiana experiences significant humidity swings between seasons. Summer humidity often exceeds 80% while winter heating drops indoor humidity below 30%. These cycles affect plaster:
- Seasonal movement effects on trim joints: Expansion and contraction stress joint compounds
- Hairline fissures at corners: Normal in extreme humidity swings
- Differential movement at substrates: Plaster and drywall respond differently to moisture changes
Strategies to minimize problems:
- Maintain consistent indoor humidity (40-50% ideal)
- Use flexible sealants at transition points
- Plan for periodic touch-up painting
- Address HVAC system humidification
The team at Indiana Wall Systems frequently addresses humidity effects on plaster trim during maintenance calls.
Historic District Requirements
Several central Indiana communities have historic districts with specific requirements:
- Indianapolis historic districts: Various neighborhoods with preservation guidelines
- Zionsville downtown: Protected historic area
- Carmel Arts and Design District: Design review requirements
Historic district interior guidelines may specify:
- Period-correct profiles matching existing character
- Approved materials and methods
- Documentation requirements
- Review processes for visible changes
Property owners in these areas should verify requirements before beginning plaster projects. Indiana Wall Systems has experience working through these review processes.
Foundation Settlement Effects
Central Indiana’s clay-heavy soils cause foundation movement in many homes. Settlement affects plaster moldings through:
- Cracking at stress concentration points
- Separation at corners and joints
- Deformation of large ceiling elements
Before repairing plaster moldings, address underlying structural issues. Cosmetic repairs fail if settlement continues.
Local Architectural Character
Central Indiana homes reflect diverse architectural periods:
- Meridian-Kessler: Victorian and early 20th-century styles
- Broad Ripple: Arts and Crafts influences
- Carmel’s historic core: Federal and Colonial Revival
- Zionsville: Varied historic styles
- Village of West Clay: New traditional designs referencing classical precedents
Matching plaster moldings to regional architectural character creates cohesive results. The pattern vocabulary of Georgian cornice differs significantly from Arts and Crafts trim profiles.
Classical Profiles and Design Patterns
Understanding classical molding profiles helps homeowners communicate effectively with contractors and make appropriate design choices. These shapes, developed over centuries, follow established proportional systems.
Basic Profile Shapes
Classical architecture established standard profile shapes that continue informing molding design:
Classical Molding Profile Reference
Understanding these shapes helps you communicate with contractors
| Profile Name | Description | Common Uses |
|---|---|---|
| Ovolo | Convex quarter-round | Transition moldings, picture rails |
| Cyma Recta | S-curve, concave top | Crown molding upper sections |
| Cyma Reversa | S-curve, convex top | Base moldings, chair rails |
| Cavetto | Concave quarter-round | Cove moldings, transitions |
| Scotia | Deep concave curve | Base assemblies, shadow lines |
| Torus | Full convex half-round | Base moldings, bead details |
| Ogee | Double curve (S-shape) | Crown, base, and panel moldings |
| Fillet | Small flat band | Separating larger profiles |
Skilled plasterers combine these shapes into complex built-up crown molding assemblies. A single cornice might include three or four distinct profiles working together.
Classical Ornament Patterns
Decorative enrichments turn plain moldings into works of art:
Egg-and-dart molding: Alternating oval and pointed shapes, symbolizing life and death in classical design. This pattern appears frequently on ovolo profiles.
Dentil molding: Evenly spaced rectangular blocks resembling teeth. Common in Georgian cornice, Federal style trim, and Neoclassical interior detailing.
Bead-and-reel molding: Alternating spherical and cylindrical shapes. Often used as smaller enrichment bands.
Acanthus leaf ornament: Stylized leaves from the Mediterranean acanthus plant. These flowing, naturalistic forms define Corinthian capitals and elaborate cornices.
Greek key fret: Interlocking rectangular patterns, also called meander designs. Used as decorative bands on frieze panels.
Rope twist molding: Twisted strand pattern adding texture to smaller profiles.
Leaf-and-tongue molding: Alternating pointed and rounded shapes, similar to egg-and-dart but with different proportions.
Period-Specific Styles
Different architectural periods featured distinctive molding characteristics:
Georgian cornice (1714-1830): Bold proportions with dentil bands, modillion blocks, and refined classical details. Rooms feel formal and balanced.
Federal style trim (1780-1830): Lighter, more delicate profiles than Georgian. Features urns, swags, and patriotic symbols. Popular in historic Indianapolis neighborhoods.
Victorian plasterwork (1837-1901): Elaborate, often heavy ornamentation. Deep cornices with multiple enrichment bands. Ceiling roses feature complex floral patterns.
Beaux-Arts plaster ornament (1880-1920): Grand scale with classical vocabulary. Features cartouches, garlands, and sculptural elements. Found in public buildings and high-end residences.
Art Deco plaster details (1920-1940): Geometric patterns, stylized natural forms, and stepped profiles. Sunburst motifs and chevron patterns define this era.
Arts and Crafts trim profiles (1880-1920): Simpler, hand-crafted aesthetic. Subtle curves and natural materials. Less ornamentation than Victorian.
Installation Methods: Cast vs. Run-in-Place
Two primary methods create plaster moldings: cast plaster molding (pre-made in workshops) and run-in-place plaster molding (formed on-site). Each approach offers distinct advantages for different applications.
Cast vs. Run-in-Place: Quick Comparison
Two methods, each with distinct advantages
- Pre-made in controlled workshop
- Consistent dimensions
- Best for repetitive elements
- Complex 3D pieces
- Easier matching for restoration
- Can be shipped to site
- Created directly on-site
- Follows irregular surfaces
- Best for long continuous runs
- Custom profiles for each project
- Handles out-of-square rooms
- Traditional artisan method
Cast Plaster Molding
Plaster workshop casting produces moldings in controlled environments before installation. The process involves:
- Creating a plaster casting mold from a pattern or existing piece
- Preparing the mold with release agents
- Pouring or pressing plaster into the mold
- Allowing proper curing (drying time for plaster casts varies by size and mix)
- Removing, finishing, and preparing pieces for installation
Mold types include:
- Silicone rubber molds: Flexible, excellent detail reproduction, durable
- Urethane rubber molds: More rigid than silicone, good for production runs
- Gelatin molds: Traditional method, single-use, captures fine detail
- Mother mold shells: Rigid supports (often fiberglass mother mold) for flexible molds
Cast plaster excels for:
- Repetitive ornamental elements (rosettes, brackets, medallions)
- Complex three-dimensional pieces
- Matching existing plaster profiles in restoration work
- Elements requiring consistent dimensions
- Shipping to job sites (with careful handling of fragile plaster)
Cast plaster installation involves:
- Preparing substrate surfaces
- Applying bonding agent for plaster (typically PVA bonding agent)
- Fitting pieces with adhesive and/or mechanical fasteners
- Filling joints with plaster
- Final touch-ups and finishing
Run-in-Place Plaster Molding
Run-in-place molding creates profiles directly on walls or ceilings using a zinc profile template mounted on a running mold stock. The plasterer draws this assembly along a guide, building up layers until achieving the desired profile.
This traditional method excels for:
- Long, continuous runs of crown molding
- Custom crown molding profiles specific to a project
- Rooms with irregular walls or out-of-square room corners
- Matching existing in-situ profiles
The process requires:
- Installing temporary guide rails
- Building up brown coat plaster as a foundation
- Applying successive passes with the template
- Finishing with finish coat plaster
- Removing guides and patching
Run-in-place work demands significant installer craftsmanship. Fewer plasterers today possess these traditional skills, making experienced ornamental plasterers valuable resources for historic restoration.
Modern Lightweight Alternatives
Glass fiber reinforced gypsum (GFRG), also marketed as GRG cornice or GRG crown molding, offers advantages for specific applications:
- Reduced weight compared to solid plaster
- Greater impact resistance of trim
- Faster installation for large commercial projects
- Pre-finished surfaces available
High-density gypsum molding and lightweight plaster molding products bridge traditional craftsmanship with modern production methods. These options suit new construction where budget and schedule constraints limit traditional approaches.
Working with Ornamental Plasterers
Finding skilled plaster artisans presents challenges. The trade requires years of experience, artistic sensibility, and technical knowledge that formal education rarely provides. Indiana Wall Systems maintains relationships with experienced ornamental plasterers capable of both restoration and new installation.
What to Look for in a Contractor
When hiring for plaster molding work, evaluate:
Experience with similar projects: Request portfolios showing completed crown molding, cornice work, and ornamental elements. Historic projects demonstrate familiarity with period-correct molding profiles.
Material knowledge: Qualified contractors understand differences between gypsum plaster, lime plaster, lime putty mixes, and modern materials. They select appropriate materials for specific applications.
Problem-solving ability: Old homes present challenges including ceiling plane irregularities, out-of-square corners, and differential movement at substrates. Experienced plasterers anticipate and address these issues.
References and reviews: Contact previous clients. Visit completed projects when possible. Verify interior finish carpenter coordination for projects involving multiple trades.
Proper insurance and licensing: Confirm coverage for the scope of work. Some projects in historic district interior guidelines require specific certifications.
The Consultation Process
Professional plaster contractors follow structured consultation processes:
- Site assessment: Evaluating existing conditions, measuring rooms, documenting original details
- Design discussion: Reviewing architectural style, room proportions, and client preferences
- Profile selection: Choosing appropriate crown molding scale for ceiling heights
- Shop drawings for moldings: Creating profile section drawings and room-by-room molding plans
- Timeline and budget: Establishing realistic expectations for custom work
For restoration projects, contractors may create profile duplication service molds from existing pieces. This ensures new work matches original historic molding matching standards.
Budget Considerations
Cost of custom plaster moldings varies significantly based on:
- Profile complexity (plain cove vs. elaborate multi-piece cornice)
- Linear footage required
- Ornamental element quantity
- Site accessibility (scaffold work for high ceilings adds cost)
- Restoration vs. new installation
- Geographic location within central Indiana
Labor intensity of ornate trim drives most costs. Simple cove molding installations cost less than elaborate Victorian cornices with multiple enrichments.
For perspective, authentic plaster crown molding typically costs 3-5 times more than polyurethane alternatives per linear foot. However, the longevity (100+ years vs. 20-30 years) and value added justify the investment for homeowners committed to quality.
Room-by-Room Molding Considerations
Different rooms within a home call for varying molding approaches based on function, formality, and environmental conditions.
Formal Living Rooms and Dining Rooms
These spaces traditionally receive the most elaborate treatment. Consider:
- Dentil cornice for dining rooms adds classical formality
- Crown molding for primary living areas should match or exceed ceiling height proportions
- Ceiling perimeter enrichment frames the room
- Plaster ceiling coffers or decorative ceiling beams with plaster trims add dimension
Formal living room plasterwork often includes coordinated elements: crown molding, picture rail, chair rail, and baseboard creating a unified design vocabulary.
Entry Foyers
First impressions matter. Entry foyer statement cornice welcomes guests with appropriate grandeur. Scale moldings to match the foyer height and width while maintaining proportion with adjacent spaces.
Consider staircase crown molding transitions and stairwell cornice continuity for two-story foyers. These areas require careful planning where crown molding for vaulted ceilings meets standard ceiling heights.
Primary Bedrooms
Crown molding for primary bedrooms should feel elegant but restful. Simpler profiles often work better than elaborate ornament. Plain plaster cove for modern rooms creates clean lines that complement contemporary furnishings while maintaining traditional character.
Kitchens and Bathrooms
Crown molding for kitchens and crown molding for bathrooms require special consideration due to environmental exposure.
Moisture concerns in bathrooms and steam exposure near plaster trim demand proper material selection and finishing. Traditional gypsum plaster absorbs moisture, potentially leading to:
- Deterioration of the plaster matrix
- Paint failure
- Mold growth behind trim
Options to address this include:
- Lime plaster (naturally more moisture-resistant)
- Proper ventilation in wet areas
- Quality primer sealer applications
- Maintaining appropriate clearance from direct water contact
Kitchen grease exposure near crown affects finish durability. Specify washable paint finishes and plan for periodic cleaning ornate plaster moldings.
Open Concept Layouts
Modern crown molding for open concept layouts presents unique challenges. Where traditional homes featured distinct rooms with consistent ceiling heights, contemporary floor plans may combine spaces with varying conditions.
Strategies include:
- Crown return details at open ends where molding terminates
- Transition from plaster crown to drywall areas handled with crown molding return blocks
- Consistent profile selection across connected spaces
- Clean termination at cabinets and built-ins
Installation Best Practices
Proper installation ensures plaster moldings perform beautifully for generations. These practices separate professional work from amateur attempts.
Substrate Preparation
Successful installation begins with proper substrate preparation:
- Surface inspection: Check for loose paint, wallpaper, or previous repairs
- Addressing defects: Repair cracks, fill holes, stabilize loose plaster
- Cleaning: Remove dust, grease, and contaminants
- Priming: Apply appropriate bonding agent or primer
For calcimine ceiling preparation, special attention prevents adhesion failure. Historic homes often have calcimine (a water-based paint) on ceilings that must be fully removed before applying new plaster.
Dealing with Imperfect Conditions
Few rooms present perfectly level ceilings or plumb walls. Professional installers address:
Ceiling plane irregularities: Using shimming for level crown and flexible installation techniques to follow ceiling contours while maintaining visual consistency.
Out-of-square room corners: Standard inside corner miter joints and outside corner miter joints assume 90-degree angles. Real rooms rarely comply. Workarounds include:
- Custom-cut cope joint crown molding
- Back bevel miter techniques
- Scribe fit at uneven ceilings
- Built-up corner treatments
Differential movement at substrates: Where plaster meets drywall or different framing materials, movement can cause hairline cracking at miters. Proper detailing includes movement joints at trim transitions.
Attachment Methods
Plaster molding attachment combines adhesive and mechanical methods:
Adhesive set for plaster molding involves:
- Construction adhesive compatibility with plaster materials
- Proper bead placement and coverage
- Adequate cure time before finishing
Mechanical fasteners for plaster trim provide backup security:
- Screw and plug fastening for heavy pieces
- Countersinking below surface
- Filling fastener holes with matching plaster
Lightweight pieces may rely primarily on adhesive. Heavy cornices and ceiling medallions require mechanical attachment for safety.
Joint Treatment
Invisible joints distinguish professional installations:
- Align pieces carefully during installation
- Fill gaps with appropriate plaster mix
- Tool joints while wet for smooth transitions
- Sand carefully after curing (with silica dust control)
- Prime and paint uniformly
Properly treated joints become invisible, creating the appearance of continuous molding runs.
Painting and Finishing Plaster Moldings
Finish selection and application significantly affect how plaster moldings appear and perform over time.
Priming Requirements
New plaster requires proper priming before paint:
- Allow adequate drying (varies by plaster type and thickness)
- Apply stain-blocking primer for plaster to seal the surface
- Spot-prime any repairs with peel-stop primer on chalky plaster if needed
- Sand lightly between coats
Plaster primer sealer prevents differential absorption that causes blotchy finish coats.
Paint Selection
Painted cornice details benefit from appropriate paint selection:
- Flat or matte finishes: Hide imperfections, traditional appearance
- Satin finishes: Easier cleaning, subtle sheen
- Semi-gloss: Maximum durability, highlights detail
Consider the room function when selecting sheen. Formal rooms often look best with lower sheen finishes that reference historical practice.
Color Approaches
Paint line cut-in at crown requires careful technique for crisp shadow line paint definition. Options include:
Monochrome molding paint: Crown, walls, and ceiling in the same color creates contemporary elegance and makes small rooms feel larger.
Two-tone crown treatment: Crown matches ceiling color while walls differ. Traditional approach that clearly defines the room perimeter.
Contrast molding paint: Crown in accent color (often white) against colored walls and ceiling. Highlights architectural detail.
Period-appropriate schemes: Historic color palettes often featured tinted cornices, gilded enrichments, or polychrome decoration.
Avoiding Common Mistakes
Paint build-up on fine ornament obscures detail over decades of repainting. Avoid:
- Excessive paint thickness from multiple coats
- Thick latex paints that fill fine details
- Drips and runs in ornamental crevices
Maintaining crisp detail after repainting requires:
- Light sanding between coats
- Thin, even paint applications
- Brushing out of recesses
- Professional technique for elaborate ornament
When inherited moldings show excessive paint build-up, consider stripping paint from plaster ornament safely. Gentle chemical stripping for plaster and non-abrasive cleaning for plaster details restore original crispness.
Maintenance and Repair
Proper maintenance extends plaster molding life while preserving beauty. Understanding common issues helps homeowners address problems before they become serious.
Plaster Molding Maintenance Essentials
⚠️ Pre-1978 Homes: Test for lead paint before any sanding or disturbance
Routine Maintenance
Regular care includes:
Dusting carved plaster ornament: Use soft brushes or vacuum with brush attachment. Avoid wet cleaning for routine maintenance.
Periodic inspection: Check for cracks, loose sections, or moisture damage annually.
Addressing humidity effects on plaster trim: Maintain consistent indoor humidity (30-50%) to minimize seasonal movement effects on trim joints.
Common Repair Needs
Repairing chipped plaster molding: Small chips repair easily with patching plaster matched to original consistency.
Patching small plaster nicks: Fill with setting-type compound, sand smooth, prime and paint.
Filling voids in plaster ornament: Deep voids require building up layers, allowing each to cure before adding more.
Hairline fissures at corners: Clean, fill with flexible filler, feather edges, repaint.
Repairing recurring joint cracks: Address underlying cause (movement, settlement, temperature cycling) before cosmetic repair.
Significant Repairs
Major issues require professional attention:
In-situ cornice repair: Repairing cornices in place without removal.
Cornice crack repair: Structural cracks indicating substrate movement need investigation and proper remediation.
Cornice corner repair: Damaged corners may require missing ornament replication using molds from intact sections.
Delaminated plaster repair: Sections separated from substrate require plaster reattachment washers and consolidation before patching.
Recasting broken plaster pieces: Badly damaged ornaments may need reproduction from molds of matching elements.
Safety Considerations
Older plaster moldings may contain hazardous materials:
Lead paint considerations in older moldings: Pre-1978 paint may contain lead. Test before disturbing. Follow EPA RRP (Renovation, Repair, and Painting) requirements.
Respiratory protection during sanding: Even lead-free plaster dust irritates respiratory systems. Use N95 or better respirators.
Silica dust control: Plaster contains silite. Wet sanding and vacuum collection minimize dust.
Jobsite protection for plaster dust: Contain work areas and protect furnishings during any sanding or demolition.
Integrating Plaster Moldings with Modern Features
Contemporary homes can incorporate classical plaster moldings without appearing dated. Thoughtful integration creates spaces that feel both timeless and current.
Lighting Integration
Cove lighting integration turns utilitarian plaster coves into dramatic light sources:
- LED strip in cove provides indirect illumination
- Concealed indirect lighting cove hides fixtures entirely
- Uplighting at cornice washes ceilings with ambient light
- Downlighting wash from crown highlights wall surfaces
Crown molding with integrated lighting channel accommodates LED strips or rope lights. Custom profiles include built-in channels invisible from below.
Design considerations:
- Specify LED color temperature appropriate to room function
- Ensure adequate cove depth for fixture concealment
- Plan electrical rough-in during construction or renovation
- Consider dimming capabilities for atmosphere control
Cabinetry and Built-Ins
Crown molding above cabinetry integrates kitchen and built-in cabinets with room architecture. Options include:
- Crown molding at built-ins: Continuing room crown across cabinet tops
- Separate cabinet crown that complements but differs from room crown
- Clean termination at cabinets where room crown stops before cabinetry
Fireplace Surrounds
Crown molding at fireplace surrounds ties mantels into room design. Plaster mantel surround details may include:
- Pilasters flanking the firebox
- Entablature with crown molding above
- Frieze panels between pilasters and crown
- Applied ornaments (swags, urns, medallions)
Planning Your Plaster Molding Project
Successful plaster molding projects require thoughtful planning. Property owners who invest time upfront achieve better results and avoid common pitfalls.
Defining Project Scope
Start by identifying what you want to accomplish:
- Restoration vs. new installation: Are you matching existing profiles or creating new designs?
- Room priorities: Which spaces receive the most elaborate treatment?
- Budget parameters: Understanding cost ranges helps focus decisions
- Timeline flexibility: Custom work requires more lead time than stock profiles
Consider how plaster moldings integrate with other planned work. Painting, flooring replacement, and electrical upgrades all affect sequencing.
Assessing Existing Conditions
Before requesting quotes, evaluate current conditions:
Ceiling and wall surfaces: Note cracks, repairs, water damage, or unevenness Existing trim: Document profiles, dimensions, and condition of any original moldings Room geometry: Measure ceiling heights, identify out-of-square conditions Access considerations: Furniture removal, scaffold requirements, protection needs
Photographs help contractors understand scope before site visits.
Creating a Design Vision
Gather inspiration while remaining realistic about budget and architectural appropriateness:
- Photograph details in similar homes
- Research your home’s architectural style
- Note specific profiles, proportions, and ornaments you prefer
- Consider how lighting affects molding visibility
Professional designers assist with period-appropriate selections when historical accuracy matters.
Sequencing with Other Work
Plaster molding installation fits into larger renovation sequences:
Before molding installation:
- Structural repairs completed
- Rough electrical, plumbing, HVAC in place
- Drywall or plaster wall surfaces finished
- Ceiling surfaces completed
After molding installation:
- Fine sanding and touch-up
- Priming
- Painting (typically multiple coats)
- Final trim and cleanup
Disrupting completed moldings for subsequent electrical or plumbing work damages results and increases costs.
Material Selection Considerations
Choose materials appropriate to specific conditions:
Material Selection by Location
Choose the right plaster material for each application
| Location | Recommended Material | Reason |
|---|---|---|
| 🏛️ Formal Living Areas | Traditional Gypsum or Lime | Maximum detail and durability |
| 🚿 Bathrooms | Lime Plaster or GRG | Superior moisture resistance |
| 🏢 Commercial Spaces | GFRG / GRG | Weight reduction, faster install |
| 🏚️ Historic Restoration | Match Original (usually lime) | Period accuracy required |
| 💰 Budget-Conscious | Gypsum with Proper Sealing | Cost-effectiveness with quality |
Understanding Costs and Return on Investment
Plaster molding investment varies significantly based on project scope, complexity, and regional factors. Understanding cost drivers helps homeowners budget appropriately.
Cost Factors
Primary cost influences include:
- Linear footage: More molding equals higher material and labor costs
- Profile complexity: Simple coves cost less than elaborate cornices
- Ornamental elements: Medallions, rosettes, and specialty pieces add cost
- Installation conditions: High ceilings requiring scaffolding increase labor
- Existing conditions: Restoration work often costs more than new installation
- Custom work: Period-specific profiles require pattern-making and molds
- Timeline: Rush projects command premiums
Budget Ranges
General ranges for central Indiana projects (2024-2025):
Plaster Molding Cost Guide
Typical ranges for central Indiana projects
Ceiling Medallions: $300 – $3,000+ depending on size and complexity
Ceiling medallions typically range from $300-800 for standard sizes, with elaborate custom pieces reaching several thousand dollars.
Value and Return
Interior value perception of original moldings significantly impacts property values. Appraisal impact of architectural trim appears in comparable sales analysis when similar homes with and without quality trim sell in the same market.
Buyer appeal for period detailing especially strong in:
- Historic districts
- Luxury market segments
- Neighborhoods with architectural character
- Homes competing against new construction
Homeowners rarely recoup 100% of plaster molding investment at resale, but the quality-of-life improvement during occupancy and competitive advantage when selling justify costs for many families.
Working with Designers and Architects
Major plaster molding projects benefit from professional design guidance. Architects and interior designers bring expertise in proportion, period accuracy, and coordination with other finishes.
Designer Sourcing for Plaster Moldings
Experienced designers maintain relationships with:
- Ornamental plasterers and workshops
- Architectural salvage sources
- Specialty plaster suppliers
- Historic preservation consultants
Designer sourcing for plaster moldings simplifies specification and procurement while ensuring appropriate selections.
Specification Process
Architect specifying plaster cornices follows established procedures:
- Architectural drawing details for cornice: Sections, elevations, and details
- Shop drawings for moldings: Contractor-prepared fabrication drawings
- Profile section drawings: Full-size profile templates
- Interior design detailing schedule: Coordinating moldings with other finishes
Coordination Requirements
Plaster molding work interfaces with multiple trades:
- Interior finish carpenter coordination: Wood trim, cabinetry, doors
- Electrical: Lighting, outlets near molding
- Painting: Sequencing finish work
- HVAC: Register placement relative to crown
Professional project management ensures smooth coordination.
Plaster Molding Services Across Central Indiana
Indiana Wall Systems serves homeowners throughout central Indiana with full-service plaster capabilities. The company’s 26 years of experience and 160+ years of combined team expertise ensure quality results for any project.
Service Area Coverage
Professional plaster molding services available in:
- Hamilton County: Carmel, Fishers, Westfield, Noblesville
- Marion County: Indianapolis, Speedway
- Boone County: Zionsville
- Hendricks County: Avon, Plainfield, Brownsburg
- Johnson County: Greenwood, Franklin
- Extended areas throughout southern Indiana and northern Kentucky
Serving Central Indiana & Beyond
Professional plaster molding services across the region
Available Services
Full-scope plaster molding capabilities include:
- New crown molding installation
- Cornice and frieze work
- Ceiling medallion and rose installation
- Panel molding and wainscoting
- Door and window casing
- Historic molding matching and restoration
- Custom profile creation
- Ornament repair and replication
- Paint preparation and finishing
The Indiana Wall Systems Difference
What separates professional plaster work from amateur attempts:
Material expertise: Proper selection of gypsum plaster, lime plaster, or modern alternatives for specific applications.
Installation skill: Decades of experience handling challenges like irregular surfaces, period restoration requirements, and complex geometries.
Attention to detail: Invisible joints, crisp paint lines, and finished results that enhance property value.
Project management: Coordination with other trades, realistic scheduling, and clear communication throughout.
Ready to Add Timeless Elegance to Your Home?
Indiana Wall Systems brings 22+ years of plaster expertise to every project. From historic restoration to new installations, our craftsmen deliver results that last generations.
Frequently Asked Questions
How long do plaster moldings last compared to alternatives?
Authentic plaster moldings last 100 years or more with proper maintenance. Compare this to polyurethane (20-30 years) or MDF alternatives (30-50 years). Plaster also repairs more easily than synthetic materials, extending useful life indefinitely with periodic professional attention.
Can plaster crown molding be installed in bathrooms?
Yes, with proper material selection and finishing. Lime-based plasters resist moisture better than standard gypsum. Adequate bathroom ventilation, quality primer and paint, and keeping molding clear of direct water contact ensure long-term performance in wet areas.
What crown molding size works best for 8-foot ceilings?
For standard 8-foot ceilings, select crown molding 3 to 5 inches in height. Larger profiles overwhelm the space while smaller ones appear insignificant. Simple cove profiles or restrained classical designs suit these ceiling heights better than elaborate ornamental cornices.
How much do custom plaster moldings cost?
Custom plaster molding costs range from $25 to $150+ per linear foot depending on profile complexity, installation conditions, and whether work involves restoration matching. Simple coves cost less while elaborate run-in-place cornices with enrichments cost more. Ceiling medallions add $300-3,000+ per piece.
Can damaged plaster moldings be repaired or must they be replaced?
Most plaster damage repairs successfully without full replacement. Chips, cracks, and minor deterioration address through patching. Even significant damage (broken ornaments, delaminated sections) often repairs by recasting missing pieces from molds made of intact sections. Complete replacement becomes necessary only with widespread structural failure.
How do I find a qualified ornamental plasterer?
Seek contractors with documented experience in similar projects, proper insurance and licensing, strong references from completed work, and willingness to provide detailed proposals. Indiana Wall Systems maintains experienced crews capable of both restoration and new plaster molding installation across central Indiana.
Do plaster moldings add value to homes?
Quality plaster moldings contribute to both perceived value and appraised value. Buyers recognize architectural character and pay premiums for period-appropriate details. In competitive markets, homes with authentic moldings stand out against new construction and renovations using synthetic alternatives.
How long does plaster molding installation take?
Timeline varies significantly based on project scope. A simple crown molding installation in a single room may complete in one to two days. Complex multi-room projects with custom profiles, ceiling medallions, and elaborate details may require several weeks including mold-making, casting, installation, and finishing.
Bringing Timeless Elegance to Your Indiana Home
Classic plaster moldings connect modern homes to centuries of architectural tradition. Whether restoring original details in a historic Indianapolis residence or adding character to new construction in Carmel, these elements elevate ordinary spaces into extraordinary environments.
The investment in authentic plaster work pays returns through daily enjoyment, long-term durability, and enhanced property value. Unlike synthetic alternatives that look similar from a distance, genuine plaster moldings reveal their quality upon close inspection, just as they have for generations.
Indiana Wall Systems brings over two decades of expertise to every plaster project. The team understands both traditional techniques and modern applications, ensuring results that honor architectural tradition while meeting contemporary performance expectations.
Ready to add timeless elegance to your interior spaces? Contact Indiana Wall Systems for a consultation about plaster molding options for your home. Call (765) 341-6020 to discuss your project with experienced professionals who understand the craft.