Everything You Need to Know to Prep, Paint, and Protect Your Stucco or EIFS for a Finish That Lasts Years—Not Seasons.
Picture this: You’re driving through Carmel, admiring those beautiful stucco homes that look like they just got a fresh coat of paint. Then you spot one that’s clearly crying for help—peeling paint, water stains, and that tired look that screams “I’ve been neglected!”
Here’s the thing: painting stucco and EIFS isn’t just about slapping on any old paint. After 22 years in the business and thousands of projects across central Indiana, I’ve seen what works and what fails spectacularly.
This comprehensive guide will walk you through everything you need to know about painting stucco surfaces the right way—whether you’re dealing with traditional cement stucco or modern EIFS (Exterior Insulation and Finish System).
Key Takeaways
- Surface preparation is 80% of the job—skip this and your paint job will fail within 2-3 years
- Not all paints work on stucco—you need breathable, alkali-resistant formulas specifically designed for masonry
- EIFS requires different techniques than traditional stucco due to its synthetic nature
- Weather timing matters more than you think—Indiana’s humidity and temperature swings can make or break your project
- Professional application saves money long-term—DIY mistakes cost 3x more to fix than hiring experts upfront
Understanding Your Stucco Type: The Foundation of Success

Before you even think about cracking open a paint can, you need to know exactly what type of stucco you’re dealing with. This isn’t just academic—the wrong paint on the wrong substrate is a recipe for disaster.
Traditional Stucco vs. EIFS: Know the Difference
Traditional stucco (also called cement stucco) consists of cement, sand, and lime applied in multiple coats over wire mesh or concrete block. It’s been around for centuries and forms a hard, durable surface.
EIFS stucco (synthetic stucco) is a modern system with foam insulation board, mesh, basecoat, and an acrylic finish coat. It’s lighter, more energy-efficient, but requires specialized knowledge for proper painting.
Here’s how to tell them apart:
Traditional Stucco Characteristics:
- Hard surface that sounds solid when tapped
- Thicker application (typically 7/8″ to 1″)
- Visible aggregate in the finish coat
- Higher alkalinity when new
EIFS Characteristics:
- Slightly softer feel when pressed
- Thinner overall system (typically 1/4″ to 3/8″)
- Smooth, consistent texture
- Flexibility that moves with temperature changes
Traditional Stucco vs EIFS Comparison
Traditional Stucco
- Thickness: 7/8″ to 1″
- Feel: Hard, solid surface
- Base: Cement, sand, lime
- Texture: Visible aggregate
- Paint Type: Acrylic or Elastomeric
- Lifespan: 50+ years
EIFS (Synthetic)
- Thickness: 1/4″ to 3/8″
- Feel: Slightly flexible
- Base: Foam + mesh + acrylic
- Texture: Smooth, consistent
- Paint Type: 100% Acrylic only
- Lifespan: 25-30 years
Why This Matters for Your Paint Job
The type of stucco determines:
- Paint selection (different formulations needed)
- Surface preparation methods
- Application techniques
- Primer requirements
- Long-term maintenance needs
As Jeff Johnson from Indiana Wall Systems explains, “I’ve seen homeowners waste thousands using exterior latex paint meant for wood siding on their EIFS. The paint literally peels off in sheets within two years because it can’t handle the thermal movement.”
Essential Tools and Materials: Setting Yourself Up for Success
Quality tools make quality results possible. Here’s what you’ll need for a professional-grade stucco painting project:
Surface Preparation Tools:
- Pressure washer (2,500-3,000 PSI)
- Wire brushes (brass and steel)
- Scrapers (various sizes)
- Masonry patch compound
- pH test strips
- Moisture meter
Application Equipment:
- Airless sprayer (for large areas)
- High-quality rollers (3/4″ to 1″ nap thickness)
- Natural bristle brushes (for detail work)
- Extension poles
- Drop cloths (canvas, not plastic)
Safety Equipment:
- Scaffolding or sturdy ladders
- Personal protective equipment (goggles, respirator, gloves)
- Safety harnesses (for multi-story homes)
Paint and Primer Selection:
- Alkali-resistant primer (essential for new stucco)
- 100% acrylic latex paint (for EIFS)
- Elastomeric paint (for traditional stucco with minor cracks)
- Low-VOC exterior paint (for indoor air quality)
Surface Preparation: The Make-or-Break Phase
Here’s where most DIY projects go wrong. Surface preparation isn’t optional—it’s everything. Skip corners here, and your beautiful paint job becomes an expensive lesson in physics.
Step 1: Comprehensive Inspection
Start with a thorough moisture barrier inspection. Look for:
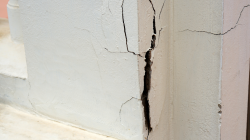
- Hairline cracks (especially around windows and doors)
- Soft spots that might indicate water damage
- Efflorescence (white chalky deposits)
- Mold and mildew growth
- Previous paint failure areas
Step 2: Pressure Washing Done Right
Pre-painting pressure rinse is crucial, but technique matters:
- Use 2,500-3,000 PSI (lower for EIFS)
- Maintain 12-18 inch distance from surface
- Work top to bottom in overlapping sections
- Allow 48-72 hours drying time before proceeding
Pro tip: Never pressure wash upward—you’ll force water behind the stucco where it doesn’t belong.
Step 3: Crack and Damage Repair
Hairline crack repair depends on your stucco type:
For Traditional Stucco:
- Clean out loose material
- Apply masonry patch compound
- Smooth with appropriate tools
- Allow full cure (typically 7-14 days)
For EIFS:
- Use flexible sealants designed for synthetic stucco
- Maintain thermal movement allowance
- Follow manufacturer specifications exactly
Step 4: Efflorescence Treatment
Those white chalky deposits aren’t just ugly—they prevent proper paint adhesion. Efflorescence treatment involves:
- pH neutralization wash with appropriate cleaner
- Thorough rinsing
- Testing with pH strips (should be 9 or below)
- Additional cleaning if needed
Step 5: Primer Application
Surface bonding agent (primer) selection is critical:
- Alkali-resistant primer for new stucco
- Penetrating primer for chalky surfaces
- Vapor-permeable primer to maintain breathability
Primer drying time varies by conditions but typically requires 24 hours minimum.
Paint Selection: Chemistry Matters
Not all paints are created equal, especially when it comes to stucco. The wrong choice here can turn your investment into an expensive mistake.
For EIFS Stucco:
100% acrylic latex paint is your best bet because:
- Flexibility to handle thermal movement
- Vapor permeability to prevent moisture trapping
- UV resistance for color retention
- Compatibility with EIFS basecoats
For Traditional Stucco:
You have more options:
- High-quality acrylic latex paint (most common choice)
- Elastomeric paint (for homes with minor crack issues)
- Silicone-modified coating (premium option for harsh climates)
Key Paint Properties to Consider:
Vapor Permeability:
Breathable coating allows moisture to escape while preventing water infiltration. This is non-negotiable for stucco applications.
Sheen Selection:
- Flat sheen: Best for hiding imperfections
- Satin sheen: Good compromise between durability and appearance
- Semi-gloss: Only for trim work
UV Resistance:
Indiana sun can be brutal. Look for paints with weatherability rating of 10 years or more.
Color Considerations
Color fade resistance varies dramatically between paint lines. Darker colors:
- Absorb more heat
- Show fading more readily
- Can cause thermal stress on EIFS systems
Pro tip: Stick to colors with Light Reflectance Value (LRV) above 50 for EIFS applications.
Application Techniques: Where Skill Meets Science
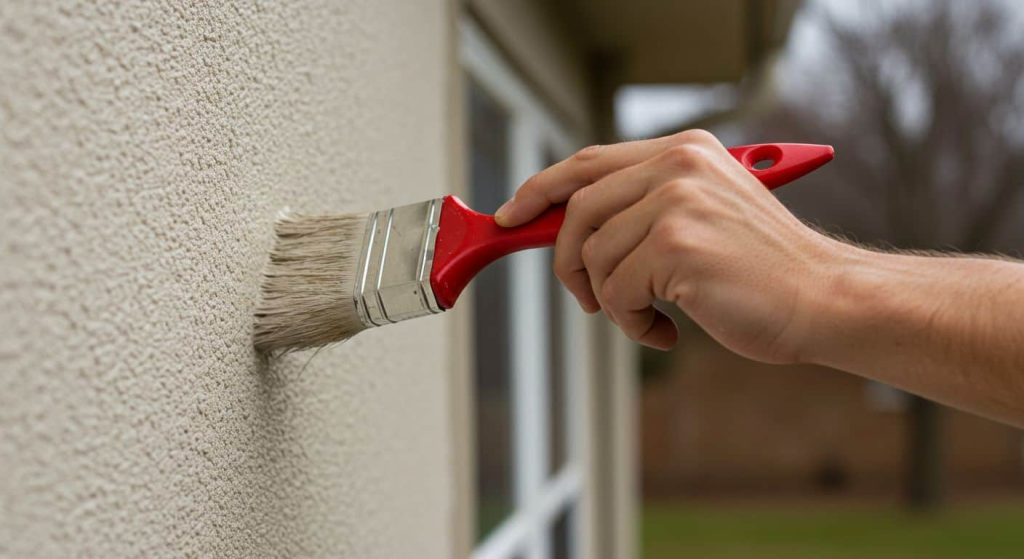
Now we get to the actual painting—but even here, technique makes all the difference between a professional result and an amateur disaster.
Weather Window Timing
Optimal humidity levels: 40-70% Temperature range for painting: 50-85°F Wind conditions: Less than 10 mph for spraying
Avoid painting when:
- Rain is forecast within 24 hours
- Surface temperature exceeds 90°F
- Humidity is above 80%
Application Methods by Surface Type
For Large, Smooth EIFS Areas:
Airless sprayer settings:
- Tip size: 0.015-0.017″
- Pressure: 2,000-2,500 PSI
- Back-rolling technique for optimal coverage
For Textured Traditional Stucco:
Roller application often works better:
- 3/4″ to 1″ nap thickness rollers
- Work paint into texture thoroughly
- Follow with light spray coat if needed
The Professional Process
First Coat Application:
- Spray application in thin, even coats
- Back-rolling technique while paint is wet
- Maintain wet edge to prevent lap marks
- Pay special attention to expansion joints
Control Joint Caulking:
This step is often overlooked but critical:
- Use paintable, flexible caulk
- Match thermal movement allowance of stucco system
- Apply after first coat, before final coat
Final Coat:
- Apply when first coat is completely dry
- Use same technique as first coat
- Ensure color coat consistency throughout
Stucco Paint Selection Guide
Traditional Stucco
• Alkali resistance
• Vapor permeable
• UV stable
EIFS (Synthetic)
• Flexible formula
• Breathable
• Thermal stability
Maintenance and Longevity: Protecting Your Investment
A quality stucco paint job should last 7-10 years in Indiana’s climate—but only with proper maintenance.
Annual Maintenance Checklist:
Spring (After Winter Damage):
- Water infiltration checks around windows and doors
- Inspect for new cracks or damage
- Clean gutters and downspouts
- Pressure wash if needed (gentle setting)
Summer (Peak Performance Season):
- Monitor for chalking prevention on south-facing walls
- Check for paint adhesion issues
- Address any mold and mildew growth immediately
Fall (Preparation Season):
- Weep screed inspection and cleaning
- Rust staining prevention treatments
- Touch-up any damaged areas before winter
Winter (Monitoring Phase):
- Watch for ice dam damage
- Monitor moisture intrusion around problem areas
- Plan next year’s maintenance needs
Maintenance Repaint Cycle
Don’t wait for total failure. Color fade resistance typically starts declining after:
- 5-7 years for premium paints
- 3-5 years for standard paints
- 2-3 years for budget paints
Warning Signs You Can’t Ignore:
- Chalking when you run your hand across the surface
- Peeling or flaking paint
- Water stains or discoloration
- Soft spots when pressing on EIFS
- Cracks wider than 1/8″
Cost Analysis: Investment vs. Expense
Let’s talk numbers because proper paint jobs aren’t cheap—but paint failures are expensive.
Paint Longevity Comparison
Professional Painting Investment:
Typical Costs for Indiana Homes:
- 1,500 sq ft home: $3,500-$5,500
- 2,500 sq ft home: $5,500-$8,500
- 3,500+ sq ft home: $8,500-$12,000+
What Affects Pricing:
- Stucco condition (more prep = higher cost)
- Paint quality (premium paints cost 40% more but last 60% longer)
- Complexity (architectural details increase labor)
- Access difficulty (multi-story, landscaping obstacles)
DIY vs. Professional: The Real Math
DIY Apparent Savings:
- Materials: $800-$1,500
- Equipment rental: $200-$400
- Your time: 40-80 hours
DIY Hidden Costs:
- Paint failure repair: $2,000-$4,000
- Moisture damage from poor prep: $5,000-$15,000
- Safety incidents: Priceless (literally)
As Jeff Johnson notes, “I’ve fixed more botched DIY stucco paint jobs than I care to count. The homeowner always says the same thing: ‘I wish I’d just hired you in the first place.'”
Manufacturer Warranty Guidelines
Most quality paint manufacturers offer 10-15 year warranties—but only when:
- Applied by certified contractors
- Proper surface preparation completed
- Compatible primer and paint systems used
- Application follows manufacturer specifications
Common Mistakes and How to Avoid Them
After two decades in this business, I’ve seen every mistake possible. Here are the big ones that cost homeowners the most money:
Mistake #1: Skipping the Pressure Wash
Why it happens: Looks clean enough Why it fails: Paint doesn’t adhere to dirt and chalk The fix: Always pressure wash, always allow proper drying time
Mistake #2: Wrong Paint Selection
Why it happens: “Paint is paint” mentality Why it fails: Paint adhesion failure within 2-3 years The fix: Use only stucco-specific paints with proper vapor permeability
Mistake #3: Inadequate Surface Prep
Why it happens: Eagerness to get to the “fun part” Why it fails: 80% of paint failures trace back to poor prep The fix: Take prep seriously—it’s the foundation of everything
Mistake #4: Ignoring Weather Conditions
Why it happens: Project timeline pressure Why it fails: Paint curing requires specific conditions The fix: Plan projects around weather windows, not calendars
Mistake #5: Mixing Paint Systems
Why it happens: Using leftover paint from other projects Why it fails: Chemical incompatibility causes adhesion failure The fix: Use complete manufacturer warranty guidelines paint systems
Regional Considerations for Indiana Homes
Indiana’s climate presents unique challenges for exterior stucco painting:
Climate Factors:
Temperature Extremes:
- Winter lows: -10°F to 20°F
- Summer highs: 85°F to 95°F
- Thermal stress on painted surfaces
Humidity Challenges:
- Spring: High humidity with rapid temperature swings
- Summer: 60-80% humidity typical
- Fall: Ideal conditions (usually)
- Winter: Freeze-thaw cycles
Best Painting Seasons in Indiana:
Optimal Window: Late September through early November
- Lower humidity
- Stable temperatures
- Minimal rain
- Extended cure time before winter
Secondary Window: Late April through early June
- Warming temperatures
- Manageable humidity
- Before peak summer heat
Avoid: July-August and December-March
- Extreme temperatures
- High humidity or freezing conditions
- Shortened working days
Central Indiana Specific Challenges:
Cities like Indianapolis, Carmel, Fishers, and Zionsville face:
- Urban heat island effects that stress painted surfaces
- Higher pollution levels that accelerate chalking
- Mature trees that create micro-climates
- Historic neighborhoods with unique stucco types
Indiana Stucco Painting Calendar
Spring
Summer
Fall
Winter
Optimal Conditions:
Professional vs. DIY: Making the Right Choice
This decision comes down to more than just upfront costs. Let’s break down when each approach makes sense:
Choose Professional When:
Your Home Has:
- Multi-story height (safety risk)
- Complex architectural details
- Previous paint failures
- EIFS that needs repair
- Historic stucco requiring special care
You Value:
- Warranty protection
- Time savings (40-80 hours of your time)
- Quality guarantee
- Insurance coverage
- Professional results
DIY Might Work If:
Your Project Involves:
- Single-story home
- Good stucco condition
- Recent successful paint job (just refreshing)
- Small area (accent walls, etc.)
You Have:
- Extensive painting experience
- Proper equipment
- Flexible timeline
- Strong safety awareness
- Realistic expectations
DIY vs Professional: True Cost Analysis
DIY Apparent Cost
• Equipment: $400
• Your time: FREE*
DIY Real Cost
• Failure repair: $4,000
• Moisture damage: $2,300
Professional Cost
• 10-year warranty
• Insurance coverage
Advanced Techniques for EIFS Systems
EIFS stucco requires specialized knowledge that most general painters lack. Here’s what sets professional EIFS painting apart:
Understanding EIFS Movement:
Thermal movement allowance is crucial because EIFS expands and contracts more than traditional stucco:
- Summer expansion: Up to 1/2″ on large walls
- Winter contraction: Similar amounts
- Paint must accommodate this movement
Control Joint Caulking Best Practices:
Sealant Selection:
- Silicone-modified formulations
- 50-year rated performance
- Paintable within 24 hours
- Color matching capability
Application Technique:
- Remove old caulk completely
- Clean joints thoroughly
- Apply backer rod for proper depth
- Tool for smooth, concave profile
Expansion Joints Management:
These aren’t decorative—they’re functional:
- Never paint over expansion joints
- Use flexible sealants designed for movement
- Maintain manufacturer specifications
- Inspect annually for failure
Breathable Coating Science:
EIFS needs vapor permeability to function properly:
- Moisture must escape from behind the system
- Water infiltration must be prevented
- Vapor drive varies by season
- Paint film thickness affects permeability
Energy Efficiency and Performance
Here’s something most people don’t realize: the right paint can improve your home’s energy efficiency significantly.
How Paint Affects Energy Performance:
Heat Reflection:
- Light colors reflect 70-80% of solar heat
- Dark colors absorb 70-90% of solar heat
- Color selection can impact cooling costs by 10-15%
Thermal Bridging Prevention:
- Quality paint maintains EIFS insulation performance
- Cracked or failed paint allows thermal bridging
- Proper maintenance preserves R-value
Energy-Efficient Coatings:
Modern paint technology offers:
- Infrared reflective pigments
- Ceramic microspheres for added insulation
- Cool roof certified formulations
- Low-VOC formulations for indoor air quality
Performance Data:
Studies show properly painted EIFS can:
- Reduce cooling costs by 10-20%
- Extend system life by 5-10 years
- Maintain R-values at design levels
- Prevent moisture issues that destroy insulation
Troubleshooting Common Problems
Even with perfect technique, issues can arise. Here’s how to diagnose and fix common problems:
Problem: Paint Peeling in Sheets
Diagnosis:
- Usually adhesion failure
- Often caused by alkaline substrate
- Can indicate moisture intrusion
Solution:
- Remove all loose paint
- pH neutralization wash
- Alkali-resistant primer
- Reapply with compatible paint
Problem: Chalking After 2-3 Years
Diagnosis:
- UV degradation of paint film
- Often low-quality paint
- Can be over-thinning during application
Solution:
- Power wash to remove chalk
- Surface bonding agent if severe
- Repaint with high-quality acrylic
Problem: Hairline Cracks Appearing
Diagnosis:
- Normal thermal movement
- Substrate movement
- Paint inflexibility
Solution:
- Elastomeric paint for traditional stucco
- Flexible repair caulk for EIFS
- Proper surface preparation
Problem: Color Fading Quickly
Diagnosis:
- Low-quality pigments
- Excessive heat exposure
- Poor surface preparation
Solution:
- Use fade-resistant pigments
- Consider lighter colors
- Proper primer system
Seasonal Maintenance: Year-Round Protection
Protecting your painted stucco isn’t a one-time job—it’s an ongoing relationship with your home’s exterior.
Annual Stucco Maintenance Timeline
Spring Inspection
• Clean & assess
• Plan repairs
Summer Monitoring
• Control mold/mildew
• Document changes
Fall Maintenance
• Complete repairs
• Winter preparation
🎯 PEAK SEASON
Winter Planning
• Plan next year
• Budget preparation
Spring Maintenance (March-May):
Post-Winter Assessment:
- Water infiltration checks around all penetrations
- Inspect for freeze-thaw damage
- Look for new cracks or separations
- Gentle pressure wash if needed
Action Items:
- Touch-up paint on damaged areas
- Re-caulk any failed joints
- Clean gutters and downspouts
- Trim vegetation away from walls
Summer Maintenance (June-August):
Peak Performance Monitoring:
- Watch for heat stress signs
- Monitor south-facing walls closely
- Check for mold and mildew in shaded areas
- Inspect sprinkler systems for overspray
Action Items:
- Adjust irrigation to avoid walls
- Clean surfaces monthly in humid weather
- Document any changes for fall planning
- Prepare for major work during ideal weather
Fall Maintenance (September-November):
Prime Work Season:
- Comprehensive inspection
- Major repairs and touch-ups
- Preparation for winter
- Planning next year’s projects
Action Items:
- Complete all painting projects
- Final caulking and sealing
- Deep cleaning before cold weather
- Document maintenance for warranty
Winter Maintenance (December-February):
Monitoring and Planning:
- Visual inspections during good weather
- Document any issues for spring action
- Plan next year’s maintenance budget
- Research improvements and upgrades
Action Items:
- Emergency repairs only
- Keep areas clear of ice and snow
- Monitor for ice dam damage
- Prepare spring action plan
Technology and Innovation in Stucco Painting
The stucco painting industry isn’t standing still. New technologies are making better results possible while reducing environmental impact.
Smart Materials Integration:
Self-Cleaning Paints:
- Photocatalytic titanium dioxide
- Breaks down organic pollutants
- Reduces maintenance requirements
- Extended service life
Cool Roof Technology:
- Infrared reflective pigments
- Ceramic microsphere additives
- Heat island reduction
- Energy code compliance
Application Technology Advances:
Airless Sprayer Settings Optimization:
- Computer-controlled pressure
- Consistent film thickness
- Reduced overspray
- Material waste reduction
Thermal Imaging for Quality Control:
- Even coverage verification
- Moisture detection
- Thermal bridge identification
- Quality documentation
Low-VOC Exterior Paint Evolution:
Modern formulations offer:
- Zero VOC options available
- Performance equal to traditional paints
- Faster cure times
- Better odor control
Future Trends:
- IoT integration for monitoring paint performance
- Bio-based paint formulations
- Self-healing coating technologies
- Color-changing thermochromic paints
FAQs: Your Most Common Questions Answered
After 22 years of painting stucco in central Indiana, these are the questions I get asked most often:
How long should I wait to paint new stucco?
Traditional stucco: 60-90 days minimum. New cement stucco has high alkalinity that must neutralize before painting.
EIFS: Can typically be painted immediately since the acrylic basecoat is already cured.
Can I paint over existing paint on stucco?
Yes, if the existing paint is in good condition. Surface preparation is key:
- Remove all loose or peeling paint
- Clean thoroughly
- Prime any bare spots
- Use compatible paint systems
What’s the best time of year to paint stucco in Indiana?
Fall (September-November) is ideal:
- Lower humidity
- Stable temperatures
- Extended cure time before winter
- Less chance of rain
Late spring (April-May) is second choice.
How often should I repaint my stucco?
EIFS: 7-10 years with quality paint Traditional stucco: 8-12 years with premium coatings Budget paints: 3-5 years maximum
Can I use regular house paint on stucco?
No. Stucco requires specialized paints with:
- Alkali resistance
- Vapor permeability
- Flexibility for thermal movement
- UV resistance
How do I know if my stucco needs repainting?
Watch for these warning signs:
- Chalking when touching the surface
- Fading or discoloration
- Peeling or flaking
- Water stains
- Cracks in painted areas
What causes paint to fail on stucco?
The top causes:
- Poor surface preparation (80% of failures)
- Wrong paint type
- Moisture intrusion
- Alkaline substrate without proper primer
- Application in poor weather
Should I hire a professional or DIY?
Hire a professional if your home has:
- Multiple stories
- EIFS system
- Previous paint failures
- Complex architectural details
- Time constraints
DIY might work for:
- Single-story homes
- Good existing condition
- Small areas
- Experienced painters
Conclusion: Your Path to Lasting Beauty
Painting stucco and EIFS the right way isn’t rocket science, but it does require knowledge, preparation, and attention to detail. Whether you’re refreshing a stucco home in Carmel or tackling a commercial EIFS project in Indianapolis, the principles remain the same.
Remember these key points:
Surface preparation truly is 80% of the job. Rush this phase, and your paint job will fail prematurely no matter how expensive the paint.
Choose the right materials for your specific stucco type. EIFS paint needs different properties than traditional stucco paint.
Weather timing can make or break your project. Indiana’s climate offers ideal windows—use them.
Professional application often saves money long-term, especially for EIFS stucco or complex projects.
Regular maintenance extends paint life dramatically. A little attention each season prevents major problems.
Quality materials cost more upfront but deliver better value over time through extended service life and superior performance.
As I tell my clients, “A successful paint job starts with understanding what you’re painting and ends with protecting that investment through proper maintenance.”
Whether you’re planning a stucco painting project yourself or evaluating painting contractors, use this guide as your roadmap to professional results that will protect and beautify your home for years to come.
The art of painting stucco combines technical knowledge with skilled application. Master both, and you’ll have a home’s exterior that not only looks beautiful but performs efficiently and lasts for decades.
Ready to transform your stucco home? Contact Indiana Wall Systems at (765) 341-6020 for a free consultation and estimate. Our team brings 22 years of expertise to every project across central Indiana.
